
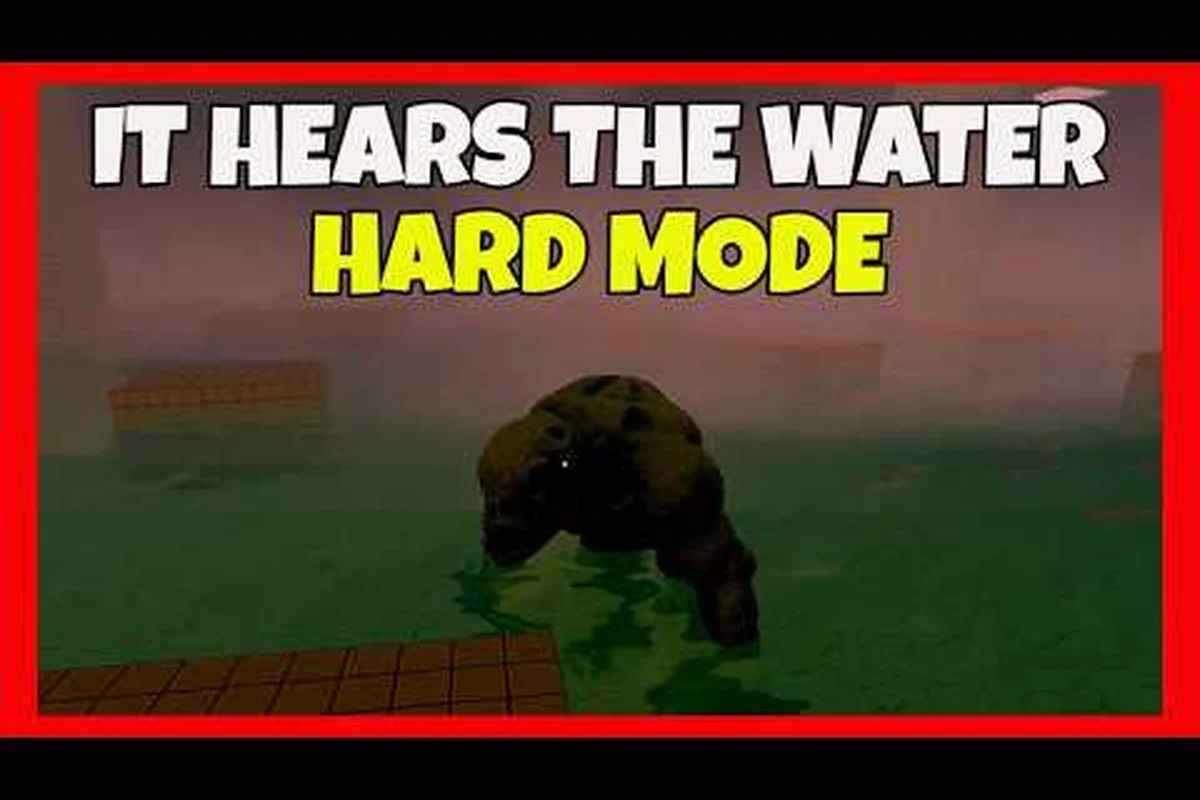
DONT SPLASH punishes a loud mistake more than a slow one, so a better retry guide can turn repeated deaths into measurable progress. Learn to read yellow platforms, wall arrows, checkpoints, and sound cues so the next attempt is safer.
What Makes a DONT SPLASH Retry Work?
A productive retry is not simply another run from the opening area. It is a deliberate loop that preserves the useful knowledge from your last death, identifies the exact mistake that ended the run, and changes one variable before you continue. That matters because the creature reacts to splash sounds rather than directly following your vision, according to the official DONT SPLASH game page.
This dont splash retry guide focuses on observable cues instead of gear. The most reliable players still fail, but they fail earlier, notice the same warning signs, and avoid repeating an identical mistake three times. Their progress comes from route knowledge, which is valuable even before expensive upgrades are available.
| Retry outcome | What it reveals | Best next action |
|---|---|---|
| Death after a jump | Gap timing or landing point was unclear | Mark the landing edge before retrying |
| Creature appears after entry | Splash attracted the monster | Slow down and identify the sound source |
| Death near a wall arrow | Route reading was ignored | Follow arrows even when another path looks shorter |
| Death after the water rises | Route consumed too much time | Identify a safe waiting point near the exit |
| Death at a rotating bridge | Moving-platform timing was wrong | Watch one full plank cycle before stepping |
A knowledge checkpoint can be mental, but writing it down makes the loop more reliable. Record the last safe location, the first incorrect turn, and one action to change on the next run. This approach supports the broader winning strategy for DONT SPLASH by turning vague experience into actionable information.
Build a Three-Stage Learning Loop
Use a repeatable three-stage process after every failure: observe, isolate, adjust. Observation means watching the route and listening for the water or monster cues. Isolation means identifying the earliest point where the run diverged from a successful plan. Adjustment means changing your pace, path, or timing before attempting the same section again.
-
Observe: Re-enter the area without rushing and note visible route markers, especially yellow platforms and black wall arrows.
-
Isolate: Determine whether the mistake came from a bad decision, a missed jump, an accidental splash, or a slow passage.
-
Adjust: Make one deliberate change, such as waiting through a moving-plank cycle or landing closer to the platform's center.
-
Verify: Reach the next safe zone and confirm that the new pattern works before trying to optimize further.
-
Advance: Once the section feels consistent, preserve it in memory and focus on the next uncertain point.
This dont splash map strategy is especially effective because it prevents a failed section from swallowing the entire run. If you can consistently reach the maintenance area, for example, your next concern should be the lock and the rising water rather than repeatedly testing the opening route.
Reading Checkpoints, Yellow Platforms, and Arrows
The map gives you more information than the creature does, so treat every marker as a route instruction. Yellow platforms indicate a path that can be read as a connected chain. Black arrows on walls point toward the intended direction. A verified DONT SPLASH walkthrough by Zac Worthy demonstrates this approach: follow the yellow platforms and wall arrows, cross rotating bridge planks, operate both valves in the maintenance lock, and then climb toward the high exit.
| Route signal | Likely meaning | Retry decision |
|---|---|---|
| Yellow platform | Part of the intended path | Prefer it over an unmarked shortcut |
| Black wall arrow | Direction of travel | Turn as soon as the arrow becomes visible |
| Rotating bridge plank | Timed crossing | Watch a complete cycle before committing |
| Maintenance lock | Two-valve objective | Find both valves before attempting the exit |
| High exit | Final climbing route | Approach it before the water reaches the area |
The practical value of a yellow-platform chain is that it removes ambiguity after a restart. Instead of trying several branches, scan forward and identify the next yellow surface. If the chain ends, pause and look for the nearby wall arrow rather than making a blind turn. This makes the dont splash safest route easier to memorize as a sequence of decisions.
Treat Checkpoints as Decision Points
A useful checkpoint is not necessarily the official respawn location. It can be any point where you know how to arrive, how to leave, and what danger follows. Strong personal checkpoints include the last dry platform before a bridge, a landing where both valves are visible, and the final stair or climb before the exit.
Record each checkpoint with three details that let you recognize the same state after every attempt. For a valve-stage room, note the valve configuration, visible arrows, and safe landing; for a bridge approach, note the plank position, arrow direction, and whether the floor remains dry. This turns a vague “restart point” into a repeatable decision point: you can tell whether the route is still valid before committing, rather than discovering a missed timing or changed hazard only after a lethal splash.
-
Entry condition: What must be true when you reach it?
-
Exit condition: Which marker, valve, or bridge comes next?
-
Failure condition: What would cause you to die immediately after arriving?
For example, a bridge checkpoint might require slow plank timing, a visible arrow on the far wall, and no splash during entry. That compact record prevents you from reaching the bridge correctly but then making a rushed decision on the other side.
The DONT SPLASH valve-stage overview can help you study the environmental puzzle before a run. Knowing the sequence does not remove the danger, but it reduces hesitation, and hesitation often causes unnecessary noise or missed timing.
Build a Two-Way Route Map
A one-way mental map fails when you return from an unexpected direction. Draw each section as a two-way relationship: the route that leads inward and the route that leads back toward safety. This is especially important near the maintenance lock because you may need to retrace part of the path after finding only one valve.
| Area type | Forward route | Return route | Typical mistake |
|---|---|---|---|
| Yellow-platform chain | Follow connected yellow surfaces | Reverse the chain toward the last known safe platform | Assuming every gap is intentional |
| Arrow corridor | Follow black arrows | Walk against the arrow direction until the next junction | Ignoring arrows during a chase |
| Rotating bridge | Wait for a full plank cycle | Return only when alignment is clear | Jumping early out of panic |
| Valve lock | Locate both valves | Backtrack along the marked corridor | Rushing upstairs after one valve |
This two-way view is the core of a durable dont splash map strategy. It also helps when comparing your safest route with the broader route through the maze, because you can identify where the intended path branches instead of memorizing isolated landmarks.
Building the Safest Route Through the Monster
The safest route is not always the shortest path. It is the route that gives you the fewest uncertain jumps, the clearest directional markers, and the most opportunities to stop safely. The monster reacts to sound, so every unnecessary step near water can compound the risk. Community tips summarized in the DONT SPLASH tips video by TonyCool also emphasize that thrown pebbles can serve as an active decoy while dry routes remain more dependable than spending on gear.
Plan around three priorities: dry footing, readable direction, and a safe place to wait. A path that looks longer may be safer if its platforms are visibly connected, its arrows are readable, and you can pause between moving objects. A shortcut that saves seconds is not worth using if it forces a blind jump over water.
| Route choice | Safety level | Why |
|---|---|---|
| Marked yellow-platform path | High | Continuous visual guidance reduces wrong turns |
| Black-arrow corridor | High | Arrows provide direction when landmarks are unclear |
| Short unmarked crossing | Medium | Saves distance but adds landing uncertainty |
| Decoy-assisted water crossing | Medium | Can redirect attention, but timing remains risky |
| Blind shortcut during chase | Low | Combines noise, uncertainty, and poor visibility |
Use a Three-Part Noise Budget
Assign each area a small noise budget based on the actions required there. Opening areas with obvious yellow platforms can use more of your budget because you can recover without making a blind landing. Narrow junctions and water crossings require more caution because a single splash may force an immediate chase.
| Situation | Noise budget | Preferred action |
|---|---|---|
| Wide platform junction | Medium | Walk normally and scan for arrows |
| Narrow yellow chain | Low | Avoid unnecessary jumps and sudden direction changes |
| Pebble throw | Controlled | Use it to test or divert attention when positioned safely |
| Maintenance lock | Low | Finish valve interactions before moving toward the exit |
| Rising-water exit | Very low | Move immediately along the known dry chain |
Pebbles are valuable because they provide an active distraction, but they should support a plan rather than replace one. A decoy cannot rescue a route that requires multiple blind jumps, and throwing one near yourself may not produce the separation you expect. The DONT SPLASH run review by Ricoko frames retries as part of the learning loop, especially before tool upgrades become affordable.
Separate Planning From Chasing
Your behavior should change when the monster appears. During exploration, read arrows and study moving planks. During a chase, use the route already identified instead of inventing new shortcuts. This is where a memorized path becomes valuable: a known yellow chain gives you a decision to make, while an unfamiliar side path forces you to think under pressure.
When the monster appears, treat every step as a test of the route rather than an invitation to improvise. Follow the yellow chain and wall arrows you already identified during exploration, and use a safe, dry path to keep the monster’s attention predictable. For example, if the next yellow platform is reachable by a short step across a known dry tile, choose that line instead of a tempting shortcut that crosses a puddle; the shortcut may save distance but create a fresh splash and reveal your position.
-
Freeze briefly: Stop adding unnecessary movement and listen for the creature’s position.
-
Identify the next marker: Find the next yellow platform or wall arrow in front of you.
-
Move on dry footing: Prefer a step that does not disturb the water.
-
Use a decoy selectively: Throw a pebble only if there is a safe landing and a clear benefit.
-
Commit to the route: Do not switch paths halfway unless a known checkpoint is closer.
The important distinction is between a planned retreat and a panicked detour. A planned retreat retraces the yellow chain to a checkpoint whose dry landing, wall-arrow route, and safe decoy position you already tested during exploration. If the monster closes the gap, return to that checkpoint instead of cutting across an unfamiliar puddle. A panicked detour introduces unknown splash tiles, breaks the creature’s predictable pursuit pattern, and turns one bad step into a chain of recoverable mistakes that may need another reset.
A Practical DONT SPLASH Solo Attempt Guide
Solo play makes the route your responsibility, so preparation should happen before spawning. Choose the intended difficulty, learn the objective of reaching the exit, and inspect the first yellow platforms and black arrows before moving. The goal of the opening run is not a flawless escape; it is a complete map of the route and the sounds that threaten it.
| Solo preparation | Method | Result |
|---|---|---|
| Set a learning objective | Focus on one uncertain section | Produces measurable progress |
| Review a prior death | Mark the first incorrect decision | Prevents a repeat chain of errors |
| Learn one distraction option | Practice throwing a pebble safely | Adds a controlled response to danger |
| Preserve the route | Record yellow chains and arrow turns | Reduces decisions during a chase |
| Set a stop point | End the run after reviewing the failure | Converts defeat into usable knowledge |
This dont splash solo guide avoids treating repeated death as evidence that the player lacks reflexes. In DONT SPLASH, every death can expose a route-reading problem, timing problem, or noise-control problem. A solo player should diagnose the failure before the next attempt, while a group can sometimes create distractions that a solo run cannot.
Run a Three-Attempt Review Cycle
After every third failed attempt, stop playing immediately and review what happened. Repeated attempts without analysis often reinforce the same error because the player repeats the route at the same speed, makes the same decision under pressure, and enters the dangerous area with the same habits.
| Attempt | Focus | What to Record |
|---|---|---|
| Attempt 1 | Survival | Where did the first dangerous sound occur? |
| Attempt 2 | Route accuracy | Which yellow chain or arrow turn was missed? |
| Attempt 3 | Consistency | Did the changed approach reach the next checkpoint? |
If three attempts fail at the same point, change the approach rather than the jump timing alone. Walk the route once slowly to relearn the sequence, then use the next run to apply that knowledge under realistic pressure. If the failure happens near the end, review the full route because rushing during the final approach can erase earlier gains.
Solo players who enjoy comparing approaches can also use the solo and multiplayer comparison to see how server size changes distraction options. The important point is that a successful multiplayer run does not automatically produce a safe solo route; your personal checkpoint plan must still work without another player creating a decoy.
Upgrade Knowledge Before Chasing Gear
Gear can help, but route knowledge is available from the first attempt and applies to every run. Community reporting in the tips material suggests that dry routes beat expensive gear, while the official game description identifies sound as the central threat. Prioritize learning because upgrades do not reveal a missed arrow or repair a bad landing plan.
| Priority | Benefit | Learning cost |
|---|---|---|
| Route memorization | Works immediately on every difficulty | Requires a few deliberate runs |
| Movement control | Reduces accidental splashes | Needs simple drills |
| Decoy practice | Creates space when used correctly | Requires safe positioning |
| Gear purchase | May support playstyle | Depends on availability and cost |
The practical order is simple: learn the route, control sound, practice distractions, and only then consider whether an upgrade changes your priorities. If you are still deciding which pass may help, review the available DONT SPLASH game passes without assuming that any purchase can replace a safer route.
Turning Deaths Into Faster Checkpoints
The strongest retry system does not aim to eliminate every mistake. It limits how long a mistake takes to correct. Instead of restarting mentally at the beginning, you preserve a clear sequence of checkpoints and know exactly which part of the map to test next. That is the purpose of this dont splash retry guide: make progress depend on knowledge you can carry into the next run.
A good checkpoint list should be short enough to recall under pressure. Aim for four to six major checkpoints, each connected to a recognizable marker and a specific next action. Include the final high exit, but stop there; the last few meters should be a continuation of the known route rather than a separate memorized sequence.
| Checkpoint | Recognition cue | Next action | Recovery if interrupted |
|---|---|---|---|
| Opening junction | First connected yellow platforms | Locate the black wall arrow | Return to the last dry platform |
| Pre-bridge platform | Visible rotating planks | Watch one full cycle | Stay on dry footing |
| Post-bridge landing | Arrow on the far wall | Follow the arrow chain | Retrace to the bridge landing |
| Maintenance lock | Two valves and lock area | Operate both valves | Use the corridor backtrack |
| High-exit approach | Visible climb route | Ascend before water rises | Follow the known exit chain |
Write the list in your own words, because a checklist copied from a guide may not match what you actually see in the environment. A personal cue such as “red-lit wall before the narrow chain” is more useful than “checkpoint two” when the screen is crowded with platforms and shadows.
Separate Fatal Errors From Noisy Errors
Not every failure has the same cause. A missed jump is a fatal error because it ends the run immediately. A noisy landing is a risk error because it may alert the creature even if you survive. A confusing turn is a route error because it wastes time and exposes you to a dangerous area. Each category needs a different correction.
| Error type | Main symptom | Corrective action |
|---|---|---|
| Fatal error | Immediate fall or caught jump | Recheck edge position and jump timing |
| Risk error | Landing in water or near the monster | Reduce movement and noise |
| Route error | Wrong junction or ignored arrow | Rebuild the checkpoint sequence |
| Time error | Reaching the exit too late | Remove detours and hesitation |
Labeling the error keeps the next attempt focused. If you usually fall at the same bridge, do not spend the run worrying about every wall arrow. If the monster repeatedly catches you after a splash, do not blame the jump. Treat each death as one primary problem, with secondary issues handled only after the main failure is under control.
Keep a One-Change Commitment
Before each attempt, choose one change and state it plainly: “I will wait for a complete plank cycle,” “I will not enter the junction until I see the arrow,” or “I will throw the pebble before crossing.” A single committed change is easier to evaluate than ten vague intentions.
| Problem | One-change commitment |
|---|---|
| Early splash | Walk the first yellow chain without jumping |
| Arrow ignored | Turn at the first arrow every time |
| Bridge timing | Watch one full rotation before stepping |
| Chase at the lock | Open both valves before leaving the room |
| Late exit | Skip the optional branch and follow the high-exit chain |
This final discipline makes the dont splash best route less about finding a secret line and more about identifying a repeatable line. The intended route shown in verified gameplay uses recognizable markers, moving planks, two maintenance valves, and a high exit. Once those pieces are linked in memory, your retries can become faster and less wasteful.
Frequently Asked Questions
What is the best way to retry in DONT SPLASH?
The best retry method is to isolate the earliest incorrect decision, record the last safe checkpoint, and change only one behavior on the next run. Re-reading the yellow-platform chain, black wall arrows, valve objective, and high-exit route prevents a small error from repeating across the entire escape.
Should players follow yellow platforms or wall arrows in DONT SPLASH?
Use both signals together. Yellow platforms show the physically connected path, while black wall arrows clarify direction at junctions or when the next platform is hard to identify. A route feels inconsistent when the player treats one marker as optional; following both creates a clearer, more reliable sequence.
Can thrown pebbles make the DONT SPLASH safest route?
Pebbles can distract the creature because it responds to sound, but they work best when thrown from safe footing and toward a clear area. They should create space for a known route, not compensate for blind jumps. If the pebble does not create useful separation, continue the dry path instead of throwing repeatedly.
How many checkpoints should a solo player memorize?
A solo player should memorize four to six major checkpoints, including the final approach to the exit. Each checkpoint needs a recognition cue, a next action, and a recovery location. This is enough structure for a focused dont splash solo guide without turning the map into an unreadable wall of notes.
Is death normal in DONT SPLASH?
Yes, deaths are a normal part of learning the routes, especially when a missed jump or accidental splash attracts the creature. The meaningful improvement comes from identifying what caused each death and changing that factor on the next attempt, rather than repeating the same speed, route, and timing decisions.