
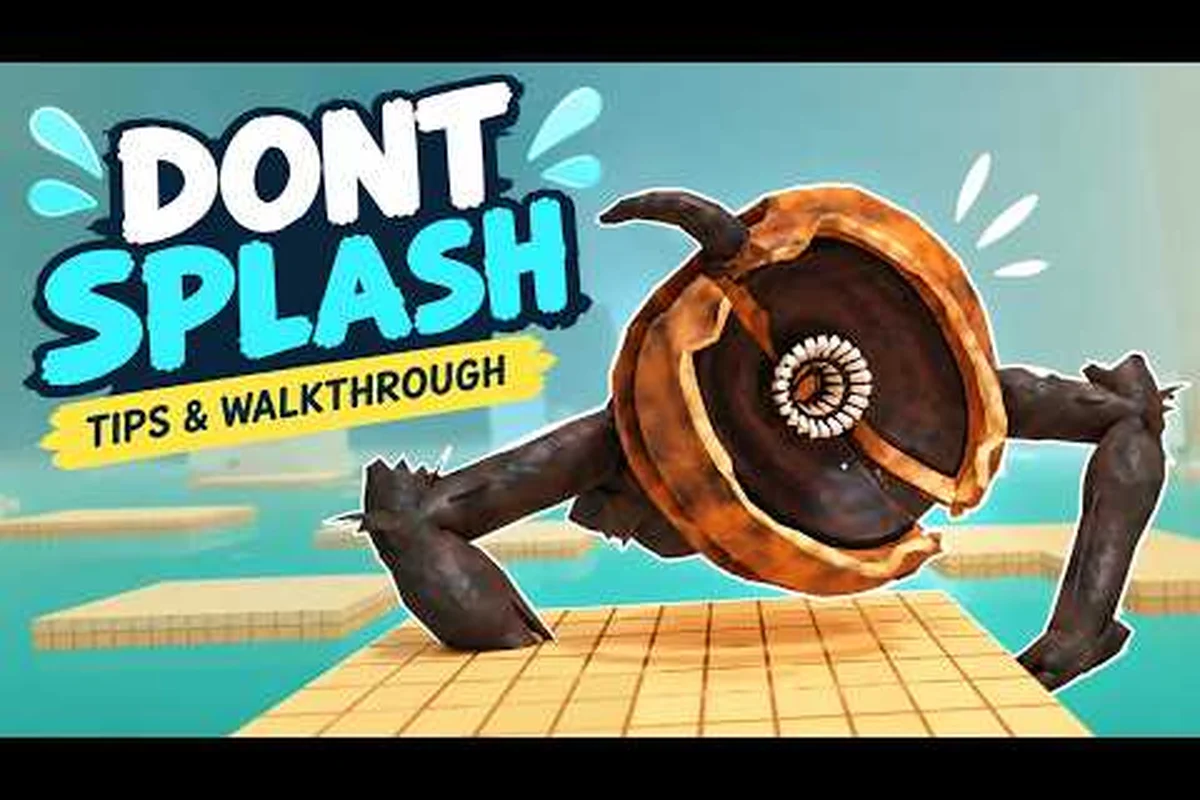
A useful dont splash winning strategy starts with mapping the pool maze before committing to a jump, then memorizing routes that keep you on stable platforms and away from unnecessary water contact. Treat every footfall and landing as a potential sound cue for the blind creature, and learn how its sound-based threat changes as you move. For example, if a direct route requires crossing a wide pool section, a longer platform route may take more time but reduce the chance of a splash revealing your position before you reach the exit.
DONT SPLASH is a Roblox horror platformer built around floating platforms, dark water, and a blind creature that hunts by sound. The official DONT SPLASH game page on Roblox describes a flooded pool maze where players must cross platforms while the monster reacts to splashing. Because success depends more on route knowledge and restraint than on expensive gear, learning the right habits early gives you a much stronger foundation for every retry.
The dont splash winning strategy starts with route recognition
The first objective is to recognize the route instead of treating every platform as an improvised jump. The intended escape path uses yellow platforms, black wall arrows, rotating bridge planks, a maintenance lock with two valves, and a climb toward the high exit. Those landmarks are far more dependable than trying to remember every small jump, and they let you recover quickly after a failed attempt.
Read the landmarks before the platforms
When you begin a run, pause near the opening area and look for color and direction cues. Yellow surfaces generally mark a safer or intended path, while black arrows point toward the next progression area. This is not a guarantee that every yellow tile is safe, but it provides a hierarchy: use the marked path first, then test uncertain edges only when necessary.
| Landmark | What it indicates | Best response |
|---|---|---|
| Yellow platform | Marked progression path | Prefer it before searching elsewhere |
| Black wall arrow | Direction toward the next route section | Follow it instead of guessing |
| Rotating bridge plank | Moving traversal obstacle | Wait for a stable alignment |
| Maintenance lock | Valve-based access puzzle | Locate and open both valves |
| High exit | Final escape objective | Approach after clearing the lock |
The most useful dont splash what to know before playing is that the environment is designed to communicate a route. Community walkthroughs consistently show players following those same cues, including opening both valves before climbing to the high exit. If you cannot see the next marker, retrace the last arrow rather than stepping randomly into the water.
Separate route knowledge from jump precision
A clean route does not guarantee a safe run. Platforming still requires control, and mistakes can send you into the pool. The practical solution is to divide the run into short checkpoints: the next arrow, the next yellow platform cluster, the rotating bridge, and the maintenance lock.
| Checkpoint | Goal | What to do after arrival |
|---|---|---|
| First arrow | Confirm the route direction | Look for the next yellow platform before moving |
| Yellow platform cluster | Maintain a safe route | Avoid optional detours near water |
| Rotating bridge | Cross the moving obstacle | Board only when the alignment is usable |
| Valve chamber | Unlock the exit path | Find and activate both valves |
| High exit | Finish the run | Climb before the rising water becomes dangerous |
Treating those landmarks as checkpoints turns failure from a complete restart into a learning process. If you need a fuller overview of the first stages, the DONT SPLASH beginner guide can help establish the basic movement and escape loop before you optimize the route.
Master sound control and monster avoidance
Your largest survivability problem is not simply seeing the creature; it is producing the sound that attracts it. The monster is blind and responds to splash sounds, so staying still on a platform can sometimes be safer than running across a noisy one. This mechanic makes every landing, accidental swim, and thrown pebble part of a deliberate noise budget.
Treat every water contact as an alarm
The rule is simple: if your body enters the water, assume the monster has received your location. Do not assume that moving away quickly will erase the cue. Use a dry platform to break line and sound continuity, then create distance before making another move.
A useful sequence is to pause on a dry yellow platform, identify which foot clipped the water, and avoid the instinctive burst of movement that can turn one accidental contact into repeated splash cues. Then, if the monster closes in, throw a pebble across the pool to create a false sound target, wait for a brief opening, and use the next yellow platform or arrow to re-establish your route with quieter, more deliberate movement.
-
Recognize the mistake: Did your feet clip the water or did you land in it?
-
Stop nearby: Do not keep running through the pool because that creates more splashes.
-
Reach a dry platform: Climb out and move beyond the immediate water.
-
Create a distraction: If you have access, throw a pebble into the water to pull attention elsewhere.
-
Resume the route: Return to the last known yellow platform or arrow.
These are the core dont splash survivability tips: quiet feet, wider spacing, and deliberate decoys work better than panic movement. The verified tips video by TonyCool highlights pebbles as the only active decoy, while the DONT SPLASH walkthrough by Zac Worthy demonstrates the monster reacting to splash sounds rather than player vision.
Decoys are useful only when placed well
A pebble can buy time, but a badly placed throw can pull the creature toward your intended path. Throw away from the next checkpoint, not toward the route you still need to cross. If the monster is already close, avoid making a second noise while preparing the decoy.
| Situation | Risk | Better decision |
|---|---|---|
| Monster far from route | Throw toward an isolated water area | Use the distraction before crossing |
| Monster near the exit path | Throw behind you, away from the next checkpoint | Keep the escape path clear |
| No pebble available | Move only across dry platforms | Accept a slower route |
| Player already in water | Stop generating extra splashes | Climb out and reset distance |
| Monster appears to ignore sound | Do not assume it is gone | Change position quietly and wait |
For a closer look at how sound and detection interact, the monster line-of-sight guide provides more detail on why remaining quiet matters even when the creature is not visibly facing you.
Turn retries into a reliable progression system
Retries are part of the intended learning loop. Community run reviews describe early progress as knowledge-based, and even experienced players can die on a missed jump. The practical response is not to rush or gamble; it is to shorten the learning cycle and remove decisions that create unnecessary noise.
Build a repeatable opening sequence
Your opening should be consistent enough that it becomes automatic. Pick a difficulty, locate the yellow platform path, follow black wall arrows, and approach the first uncertain jump with deliberate timing. Once the opening is stable, attention can shift from general orientation to route-specific details.
A good opening sequence looks like this: pause at the spawn point, identify the yellow platform path, and read the first black wall arrow before committing to movement. Use a short approach to the initial uncertain jump, then check whether the landing platform is stable and whether water lies between you and the next marker. If the monster appears or the route direction changes, stop on solid ground instead of correcting midair; a controlled reset is safer than a rushed landing that ends the run.
-
Scan before moving: Check the immediate platform, the next marker, and nearby water.
-
Move in short bursts: Cross only as far as necessary to confirm the next landing.
-
Read the arrow: Use it to decide whether the route turns, rises, or continues.
-
Protect the landing: Slow down if the final platform is narrow or surrounded by water.
-
Record the failure: If you fall, identify the exact error rather than merely recording “bad jump.”
| Failure type | Likely cause | Correction |
|---|---|---|
| Water landing | Misread distance or approach angle | Start from a slower, more controlled movement |
| Wrong turn | Ignored a black arrow | Pause and identify the direction marker |
| Monster intercept | Continued moving after a splash | Climb out, create distance, then reset |
| Bridge fall | Boarded a rotating plank at a bad angle | Wait for a stable alignment |
| Late valve search | Skipped environmental landmarks | Check every wall and side passage |
The dont splash beginner mistakes often come from urgency rather than lack of ability. Players see the exit, accelerate near water, ignore a useful marker, or assume the monster has lost track of them. Slowing the first three seconds of any uncertain section can prevent the most expensive mistake of the entire run.
For a broader route-learning system, the retry guide explains how to convert repeated attempts into consistent checkpoints instead of relying on vague memory. Track each run by route segment—such as the yellow platform path, the first black wall arrow, and the landing after the initial uncertain jump—then record whether the failure came from distance misjudgment, an ignored arrow, or a monster intercept. This turns individual retries into specific corrections: shorten the approach before a water landing, pause to read the arrow before a wrong turn, or reset only after securing distance from the monster.
Improve survivability through small decisions
You rarely win by attempting the shortest possible sequence. You win by choosing lines that limit the number of splash opportunities and give you options when the monster changes position. Dry-platform discipline is more valuable than a risky shortcut because it lets you stop, listen, and redirect without immediately entering the pool.
Choose wider routes when confidence is low
Yellow routes and black arrows provide the clearest progression, but an optional shortcut can still be the better choice when the monster is far away and the path stays on dry, stable ground. A shortcut is useful only if it reduces risk as well as distance: compare its water gaps with the main route, check whether you have room to stop, and confirm that it does not push you into a narrow passage where movement is easy to misread. For example, bypassing one shallow water crossing may save a few seconds, but a wider route with more land and visible checkpoint markers is safer when confidence is low. Ask three questions before taking the shortcut:
-
Does it cross fewer water gaps?
-
Does it provide a dry place to stop if the monster approaches?
-
Does it lead clearly toward the next checkpoint?
If the answer to any question is no, the apparent shortcut may increase the chance of a restart. Since deaths are inexpensive but time is not, the strongest dont splash winning strategy favors routes you can repeat until they become automatic.
Keep useful resources in reserve
Pebbles are the clearest decoy resource, but players can also conserve space and timing by avoiding unnecessary throws. Save a pebble for a moment when the monster blocks a required crossing, and do not throw it merely because the creature is visible. A decoy used too early has no value when the danger increases.
The tips guide for DONT SPLASH beginners expands on beginner-friendly habits, while your own run log should track whether you are wasting decoys, entering water by choice, or losing more time to route confusion than to monster encounters.
| Priority | Decision | Why it helps |
|---|---|---|
| 1 | Reach and remain on a dry platform | Limits the cost of a mistake |
| 2 | Follow marked progression cues | Reduces wrong-turn risk |
| 3 | Move quietly after a splash | Avoids attracting the monster again |
| 4 | Throw a pebble away from the route | Creates a useful distraction |
| 5 | Attempt a shortcut only when clear | Saves time without adding noise |
Manage the water as a rising pressure
The route gets more dangerous as water rises, so efficient navigation is a form of survivability. A slightly longer dry line can be safer than a direct jump that requires perfect precision. The goal is not to complete every optional action; it is to reach the high exit with enough control to handle the final climb.
The dont splash guide 2026 approach should emphasize route efficiency, not just speedrunning. Prioritize closing essential valves and clearing the checkpoints needed for the high exit; optional rooms become poor trades when a missed jump leaves you in rising water. For example, if an optional side area would require a risky return route after the water level rises, skip it and preserve the seconds gained from a clean main-path run. That margin can determine whether you can complete the final climb before the water reaches the exit.
A practical dont splash winning strategy for every retry
Use this plan before a difficult attempt: first read the route and locate key resources, then move quietly to avoid attracting enemies. Prioritize protecting checkpoints because a cleared checkpoint can save progress, but react carefully to nearby noise. For example, wait for a patrol to pass before crossing an exposed corridor, and use safe paths to reach the exit with better survivability. This step-by-step approach reduces the risk of a failed attempt.
Pre-run preparation
Before starting, decide whether you need a learning run or an escape attempt. A learning run can focus on the yellow platforms, arrows, rotating bridge, and valve chamber without demanding a flawless final approach. An escape run should begin only after the first four landmarks feel familiar.
| Pre-run goal | Checklist |
|---|---|
| Learn the route | Identify yellow platforms, black arrows, and the high exit |
| Practice water safety | Stop on dry platforms and avoid unnecessary swimming |
| Master the chase | Remember that the creature responds to splash sounds |
| Plan the lock | Confirm that both valves must be opened |
| Reduce pressure | Skip optional detours that sit close to deep water |
The step-by-step escape routine
A complete run follows a repeatable order, but the routine is about reducing decision load, not treating every platform as equally safe. Yellow-path markers, black arrows, rotating planks, maintenance-lock valves, and the high exit should be handled in sequence, with the monster’s position determining whether you pause, reposition, or take a decoy route. For example, after a splash, reaching dry ground and creating distance is more useful than immediately crossing the pool, because a bad jump can consume the margin needed to read the next yellow cluster. This order prevents improvisation while a monster is nearby and gives each movement a clear purpose.
-
Read the opening: Find the first yellow path and confirm the arrow direction.
-
Cross conservatively: Make short movements and land fully on dry surfaces.
-
Checkpoint after each marker: Once the next arrow appears, stop long enough to identify the next yellow cluster.
-
Survive splashes: If you fall, climb out immediately and create distance instead of swimming across the pool.
-
Use decoys selectively: Throw a pebble away from the next required path when it can pull the monster aside.
-
Wait for rotating planks: Board only when the moving geometry gives you a stable line.
-
Open both valves: Search the maintenance lock systematically so neither valve remains unnoticed.
-
Climb to the high exit: Do not return to optional areas once the final route opens.
This is where the dont splash winning strategy becomes practical: each step has a visible confirmation. If you cannot see the next yellow platform, black arrow, bridge, valve, or high exit, you have reached a learning moment rather than a point where random movement is likely to help.
Review the run after every failure
Spend the first minute of a new attempt reviewing the previous death. Identify the last confirmed checkpoint and the first mistake that broke the plan. This creates a short, specific assignment for the next run instead of a vague demand to “play better.”
| Review question | Record the answer |
|---|---|
| Where did the sound begin? | Missed jump, fall, splash, or decoy |
| Where was the monster? | Near, far, or already in the route |
| What cue was missed? | Yellow platform, arrow, bridge, valve, or exit |
| What decision was unnecessary? | Optional detour or early sprint |
| What should change next run? | One measurable behavior |
The central lesson of dont splash what to know before playing is that knowledge changes the risk calculation. Once you recognize the route and the monster’s hearing-based behavior, you can spend less time improvising and more time making deliberate, repeatable choices.
Frequently Asked Questions
What is the best dont splash winning strategy?
The best strategy is to follow yellow platforms and black wall arrows, cross rotating bridge planks at stable moments, open both valves in the maintenance lock, and climb toward the high exit. Avoid the water whenever possible because every splash alerts the blind monster. Use pebbles as decoys only when they can pull the creature away from your next checkpoint.
Can the monster see the player in DONT SPLASH?
No. The creature is blind and primarily reacts to splash sounds, so movement alone does not create the same detection risk as entering the water. However, walking near the pool can still lead to an accidental splash, and the noise may attract the monster toward your route. Stay on stable, dry platforms and move deliberately near edges.
What are the most common dont splash beginner mistakes?
The most common mistakes are rushing between platforms, ignoring black arrow markers, jumping without checking the next landing, entering the water after a failed move, and throwing a pebble toward the required path. Another common error is spending too long exploring optional areas. The practical fix is to use fixed checkpoints and complete both valves before making the final climb.
Should players use pebbles every time the monster appears?
No. Pebbles are limited tools, and a poorly placed distraction can block the exit route. Throw one only when the monster threatens a crossing or blocks a required path. Aim toward water away from the next yellow platform, rotating bridge, valve chamber, or high exit so the decoy creates distance without interfering with your escape.
Is learning the route more important than getting better gear?
Early learning is usually more important because the monster reacts to sound and the environment provides clear route cues. A remembered route helps you avoid water, recognize checkpoints, and react to mistakes before they become fatal. Gear may support later attempts, but quiet movement, deliberate jumps, and reliable landmark recognition form the foundation of every successful run.