
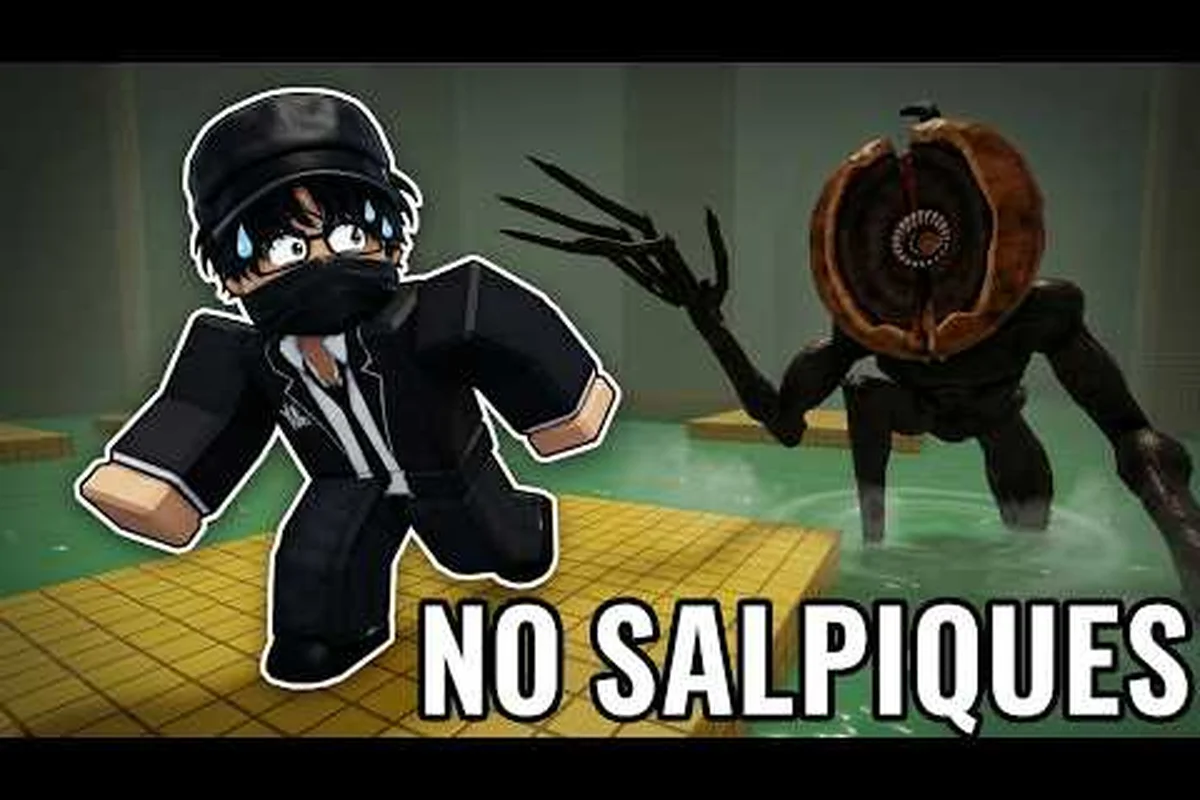
Choosing the right difficulty in DONT SPLASH changes everything from how quickly you can learn the routes to how often the creature catches you. The right mode gives you enough tension to enjoy the chase without turning every small mistake into a complete restart, so the best choice depends on your experience with the game’s sound-based danger.
DONT SPLASH Difficulty Options and the Best Choice for New Players
DONT SPLASH is a Roblox horror platformer built around a flooded pool maze, floating platforms, and a blind monster that hunts by sound. The official DONT SPLASH game page on Roblox describes the game as a Poolrooms-inspired experience where players must cross dangerous water while avoiding the creature. That means difficulty is not simply a larger number; it changes the pressure around jumping, splashing, and finding the exit.
The best starting mode is the one that lets you practice the route while still feeling dangerous. If the monster catches you before you can understand the layout, choose a gentler mode. If you already know the yellow-platform route, rotating planks, maintenance lock, and twin valves, a higher difficulty becomes more reasonable.
| Player situation | Recommended mode | Main reason | What to focus on |
|---|---|---|---|
| First time playing | Lowest available difficulty | Learn jumps without constant pressure | Yellow platforms, black arrows, and safe landings |
| You have completed several runs | Medium difficulty | Test route knowledge under pressure | Dry movement and valve timing |
| You know the full escape route | Higher difficulty | Reward precise execution | Rotating planks, decoys, and monster avoidance |
| Returning after a long break | Easy or normal | Rebuild confidence and muscle memory | Consistent movement and route planning |
Comparing the available difficulty levels
The available modes follow a general learning curve. Easy mode is best for understanding the core loop, normal mode tests whether you can turn knowledge into reliable execution, and hard mode exposes every hesitation. Because the game’s central threat reacts to water sounds, difficulty increases the cost of making a noisy mistake.
| Difficulty | Best use | Learning benefit | Main challenge |
|---|---|---|---|
| Easy | Learning the environment and controls | Gives beginners time to recognize landmarks | May feel less threatening after mastering the route |
| Normal | Regular progression and consistent runs | Balances exploration with danger | Requires deliberate movement around the monster |
| Hard | Skilled play and route optimization | Rewards precise timing and decoy use | Small errors can force a restart |
The official listing does not provide a detailed numerical explanation for every difficulty modifier, so treat community observations and in-game testing as practical guidance rather than fixed specifications. The important point is that sound-based pursuit affects every mode, and understanding that mechanic matters more than memorizing a difficulty label.
Should beginners start on easy or normal?
Start on easy if this is your first completed attempt or if you are unsure how the monster follows noise. Start on normal if you have watched a walkthrough and can already identify the yellow platforms and black wall arrows. The difference is not cosmetic: the first mode gives you room to learn, while the second asks you to reproduce that knowledge under a stricter clock.
The broader DONT SPLASH beginner guide can help you understand the controls, monster behavior, and basic escape structure before you repeatedly attempt a difficult mode. Once the basics feel familiar, return to the game and choose a difficulty that creates suspense without making the first few attempts feel random.
DONT SPLASH How to Complete a Run Using the Yellow Platform Route
A successful run starts with route recognition, not speed. The official game information and verified gameplay describe a consistent escape structure: follow yellow platforms and black arrows, cross rotating bridge planks, open both valves in the maintenance lock, and then climb toward the high exit before the water rises.
This route is particularly useful for players researching dont splash how to complete a run because it separates required objectives from optional detours. The yellow surfaces appear to mark the intended path, while the arrows help you identify where to turn when the environment looks visually repetitive. Treat both cues as route signs rather than decorations.
The reliable escape sequence
| Stage | Route cue | Objective | Common mistake |
|---|---|---|---|
| 1 | Yellow platforms | Leave the starting area without making a loud landing | Jumping into water while changing direction |
| 2 | Black wall arrows | Follow the marked turns through the pool maze | Assuming every platform belongs to the main route |
| 3 | Rotating bridge planks | Cross before the moving section shifts away | Standing still to evaluate the entire path |
| 4 | Maintenance lock | Find and open both valves | Opening one valve and leaving the area |
| 5 | High exit | Climb out before the rising water blocks the route | Wandering after completing the objective |
This sequence is the clearest answer to dont splash how to finish because it prioritizes landmarks over player skill alone. The official listing supports the environmental premise, while verified gameplay shows the intended valve and exit progression. As with any precise route, occasional layout changes may occur, but the color cues provide a useful fallback.
Move between safe platforms, not toward the fastest-looking jump
The fastest escape is rarely a straight line. A diagonal leap may look shorter, but it can force a noisy landing or split your route into two uncertain jumps. Instead, move from one marked platform to the next, pause briefly when necessary, and confirm the next landing before committing.
A dry route is more valuable than a theoretically shorter one. If you can reach the valves with no splash, the creature has less reason to interrupt the final objective. Players who study the beginner survival tips should prioritize stable landings, deliberate turns, and recognition of the arrow markers before trying risky shortcuts.
DONT SPLASH Escape Fast Methods for Every Difficulty
Fast escapes come from preparation and smooth movement, not reckless jumping. The creature tracks water sounds rather than relying on sight, according to verified gameplay. That makes deliberate movement the most transferable speed technique across all modes: the quieter your route, the more time you gain to react.
When researching dont splash escape fast, focus on the seconds lost during hesitation, repeated landings, and backtracking. Smoothly connected jumps can save several seconds over a cautious sequence, but a fall into the water can erase the entire advantage. The best speed run is the one that remains clean.
Reduce time without increasing noise
| Technique | How to apply it | Time saved | Risk |
|---|---|---|---|
| Plan the next two platforms | Look ahead before leaving the current surface | Prevents backtracking | Low |
| Use black arrows | Follow directional markers instead of guessing | Finds the main route faster | Low |
| Cross rotating planks with momentum | Start while the path is available | Shortens bridge transitions | Medium |
| Keep landings centered | Land on firm surfaces rather than edges | Reduces slips and splashes | Low |
| Use pebbles as decoys | Create a sound away from your route | Creates room to pass the creature | Medium |
| Avoid optional detours | Finish valves and climb to the exit | Preserves the rising-water margin | Low |
A pebble decoy is especially important because community tips identify thrown pebbles as the only active way to draw the creature away. It does not grant invulnerability, and a badly placed throw can still expose your position, so use it only after the creature has shown a clear reaction to sound.
Turn a difficult mode into a route rehearsal
On a higher setting, pause your speed goal and rehearse the full path mentally. Picture the sequence of yellow platforms, each black arrow, the rotating plank crossing, the maintenance lock, both valves, and the climb to the high exit. This mental sequence reduces hesitation and helps you recognize the correct route even when the environment becomes visually confusing.
If you prefer visual demonstrations, a verified dont splash walkthrough no commentary video can be useful because you can study movement without dialogue competing for attention. The available DONT SPLASH walkthrough by Zac Worthy shows the valve route and high exit, while player-reported tips emphasize that thrown pebbles and dry routes are central to avoiding the monster.
DONT SPLASH Run Notes From No-Commentary Videos
Route knowledge is most valuable before you attempt a high-difficulty run. Watch for the transition points that do not look important on a first visit: the black arrows, the point where the main route reaches rotating planks, and the location of the maintenance lock. These landmarks let you recover quickly when a jump fails or the creature interrupts you.
The objective is straightforward: activate both valves and reach the high exit. The challenge comes from doing it while avoiding water noise and a pursuing creature. A no-commentary walkthrough therefore functions less like a speed demonstration and more like a visual map you can pause and replay.
What to watch for in a walkthrough
| Visual detail | What it tells you | Action during your run |
|---|---|---|
| Yellow platform path | Main escape corridor | Follow it unless a chase forces a temporary detour |
| Black wall arrows | Confirmed direction of travel | Use the arrows to prevent route drift |
| Rotating bridge planks | Moving traversal section | Cross promptly when the alignment is safe |
| Maintenance lock | Valve objective location | Open both valves before returning to the main path |
| High exit | Final escape point | Climb immediately after both valves are opened |
| Pebble throws | Active monster diversion | Use only after confirming the creature reacts |
The same route knowledge supports players studying dont splash how to complete a run without constantly restarting. Community experience suggests that early progress is knowledge-based because tool upgrades are not yet affordable, which means understanding the map has more value than trying to overpower the creature. Memorize the landmarks, practice the transitions, and only then optimize your movement.
A difficulty guide for playing with friends is also useful if you plan to compare modes, because a shared route makes it easier to identify whether a failure came from difficulty tuning or from a missed jump. It also gives a group a common baseline for testing easy, normal, and hard settings.
DONT SPLASH How to Finish After the Monster Appears
The monster is easier to handle when you accept that it reacts to sound instead of tracking your character directly. Its presence changes your route planning, but it does not require a panic response. Stay on dry surfaces, use clear distractions, and keep moving toward the next objective.
The best response depends on your position. If the creature is far away, continue quietly. If it is close and blocking a yellow-platform route, throw a pebble away from your intended path. If you are already between the two valves, prioritize completing the objective rather than chasing a perfect avoidance route.
Threat levels and sensible responses
| Monster position | Risk | Best response | Objective |
|---|---|---|---|
| Far from the player | Low | Continue along marked platforms | Preserve the clean route |
| Moving along a nearby platform | Medium | Stop briefly and listen for its reaction | Identify whether it heard the last landing |
| Between the player and the next turn | High | Throw a pebble to the opposite side | Draw it away before crossing |
| Behind the player | Medium to high | Keep moving without splashing | Avoid turning or retreating into water |
| Near the maintenance lock | High | Complete one valve, redirect, then open the second | Preserve objective progress |
The maintenance lock is a crucial checkpoint because a failed detour can cause players to approach the objective from the wrong side. Before opening it, check the route behind you and decide where the creature can go. That two-second plan can prevent a double death and make the final escape more reliable.
When to prioritize speed and when to wait
Speed matters most after both valves are open, because the rising water can reduce your available escape time. Before that point, a brief pause is often better than a noisy mistake. You need enough margin to cross the rotating section and climb to the high exit, but chasing unnecessary seconds in the maze is not worth a splash.
If your first attempt ends soon after the valves, focus on repeating the same route rather than changing strategies. The route is already working; the missing piece is execution under pressure. If you can reach the maintenance lock consistently but fail on the final climb, practice the transition from the valve room to the high exit until it becomes automatic.
DONT SPLASH Difficulty Recommendations by Player Goal
There is no universally correct mode because the game combines platforming, sound awareness, route memorization, and chase pressure. A good recommendation matches the result you want from a run. Learning the map, finishing quickly, and testing the creature all reward different priorities.
If your goal is to understand the game, choose the easiest mode that still feels engaging. If your goal is speed, practice on normal until the route is automatic, then attempt a harder mode with a clean, repeatable run. If you want the strongest challenge, use the highest difficulty but keep the same route discipline that worked at lower settings.
| Primary goal | Recommended difficulty | Reason | Success measure |
|---|---|---|---|
| Learn every route landmark | Easy | Creates space to observe and correct mistakes | Reach the maintenance lock consistently |
| Finish a reliable first escape | Easy or normal | Encourages controlled movement | Open both valves and reach the exit |
| Improve personal completion time | Normal | Provides pressure without excessive route friction | Reduce hesitation and backtracking |
| Master decoy and chase tactics | Hard | Makes sound management more consequential | Redirect the monster without wasting progress |
| Play casually with friends | Easy | Supports communication and shared learning | Complete the objective together |
Difficulty should rise only after your route knowledge can withstand mistakes. If you cannot reliably reach the valves, increasing the setting usually adds frustration rather than meaningful challenge. Once you can complete the route, harder modes become a test of precision, timing, and monster control.
Build a two-mode strategy
A practical approach is to use one mode for learning and another for performance. Practice the full route on easy or normal, including the rotating plank timing and both valve interactions. Then return to the higher difficulty without changing your route; the mode should test your execution, not force a completely different strategy.
Players interested in progression can also check the DONT SPLASH cash and reward guide to see how completed escapes connect to future upgrades. An escape reward can improve your setup, but the route and sound discipline remain the foundation of a strong run.
DONT SPLASH Final Checklist Before You Attempt the Hardest Mode
The best difficulty choice is the one that fits your current knowledge. Use easy or normal to learn the yellow platforms, black arrows, rotating planks, maintenance lock, twin valves, and high exit. Move to a harder setting only after you can complete those sections reliably.
Before starting, confirm that you know how the creature reacts: water noise attracts attention, while a thrown pebble can redirect it. Keep a clean landing plan for every jump, remember that both valves must be opened, and head for the high exit as soon as the objective is complete.
| Checkpoint | Ready when you can answer yes | Common symptom of unprepared play |
|---|---|---|
| Opening | Do you know the first yellow-platform turn? | You explore instead of progressing |
| Mid-route | Can you follow black wall arrows under pressure? | You backtrack after taking a wrong branch |
| Bridge | Do you understand the rotating plank timing? | You wait too long or jump across a moving gap |
| Valves | Do you know both valves are required? | You leave after opening only one |
| Chase | Do you know how to use a pebble decoy? | The creature follows every landing |
| Finish | Do you know the route to the high exit? | You delay the climb after the objective |
The central takeaway is simple: route knowledge first, speed second, higher difficulty third. DONT SPLASH rewards players who understand the environment, move quietly, and turn the escape into a repeatable sequence rather than a chain of desperate decisions.
Frequently Asked Questions
What is the best difficulty for a first DONT SPLASH run?
Start on the easiest available mode for your first run. You need time to recognize yellow platforms, follow black arrows, cross rotating planks, and locate the maintenance lock. Once you can consistently reach both valves and the high exit, move up to normal or another harder setting.
Can you finish DONT SPLASH without getting caught?
Yes. The creature relies on sound rather than sight, so you can avoid it by landing quietly and staying on dry platforms. Pebbles can also draw it away, although they work best when thrown to the opposite side of your intended route. Caution remains important because a noisy landing can interrupt the entire run.
What is the fastest way to complete a DONT SPLASH run?
The fastest reliable approach is to memorize the route, move between yellow platforms, follow black arrows, cross rotating planks promptly, and open both valves before climbing to the high exit. Avoid optional detours and unnecessary jumps. A clean route is faster than a risky shortcut that ends with a splash and restart.
Is a no-commentary walkthrough useful for learning the escape route?
Yes, a visual walkthrough makes it easier to identify turning points, moving sections, the maintenance lock, and the final climb without dialogue distractions. Pause at unfamiliar areas and note the route cues. Then repeat the same path in the game until each transition becomes familiar.
Should you return to a lower difficulty after many failed runs?
Only if repeated failures are making the route harder to learn. First distinguish between a knowledge problem and an execution problem. If you know where to go but miss jumps, practice that section on the same difficulty; if you consistently lose the route, return to an easier mode and rehearse the full sequence.