
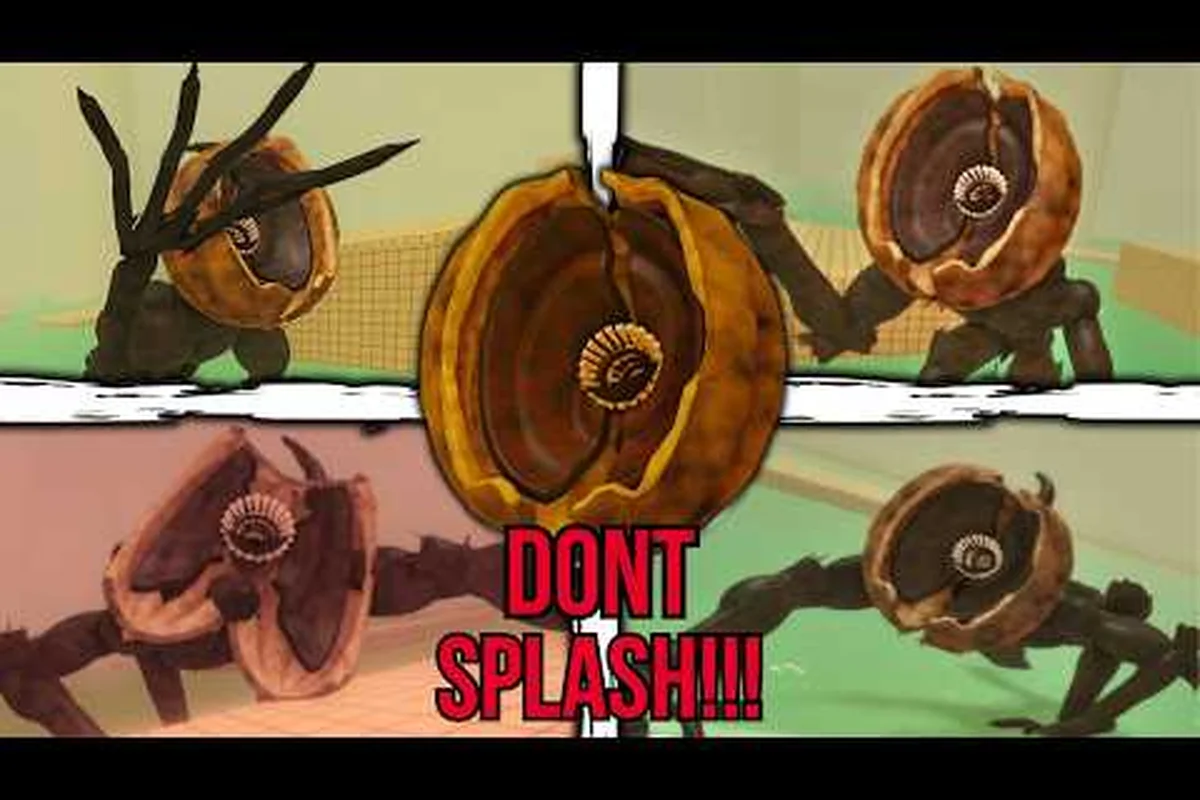
This dont splash walkthrough maps the full escape route, from the first yellow platforms to both valves and the final climb. Landings near a valve should be deliberate: if you make a splash within the blind creature’s hearing range, it can turn toward your position and interrupt the route. Move quietly between the yellow platforms, and treat each valve activation as a checkpoint before continuing toward the final climb.
DONT SPLASH Walkthrough Route Overview
The escape begins with a clear visual language: yellow platforms mark the intended path, while black wall arrows show the next direction. The route then expands into timed obstacles, a rotating plank crossing, and a maintenance lock containing two valves. Players must open both valves before reaching the high exit as the water rises.
That route information comes from the official DONT SPLASH game page on Roblox, whose description identifies the game as a flooded-platform horror challenge inspired by the Poolrooms and House of the Locust. The official premise matters because the monster is not simply patrolling by sight; it responds to sound created in the water.
| Route landmark | What to do | Main danger |
|---|---|---|
| Yellow platforms | Follow the marked path | Missing an edge and splashing |
| Black wall arrows | Turn toward the next arrow | Entering the wrong branch |
| Timed obstacles | Wait for the opening window | Rushing during a hazardous cycle |
| Rotating planks | Cross with the rotation | Being carried off balance |
| Maintenance lock | Open both valves | Returning to the wrong area |
| High exit | Climb after the valves are opened | Delaying the final escape |
Reading the early platforms
Start by following the yellow path rather than looking for the nearest possible landing. The yellow platforms are the clearest guide through the opening section, and stepping onto a surface outside that sequence can create a difficult recovery when the creature begins investigating nearby splashes.
Black arrows become important when the path turns or branches. Face the arrow before committing to the next jump, because a small correction while standing still is safer than a rushed landing. Player experience reported in community walkthroughs suggests that reading the room takes priority over collecting speed.
The route at a glance
The full progression is straightforward once its order is understood: the yellow platforms define the intended path, while the black wall arrows confirm the safe route when a junction or timed obstacle makes the usual line ambiguous. Treat the arrows as a route check rather than decoration, because a wrong turn can send you toward the rising water and force a checkpoint reset. This route is more intense than it looks, but it is not especially scary; the main challenge is sequencing, not constant quick reactions.
-
Follow the yellow platforms from the starting area.
-
Read each black wall arrow and move toward the next safe section.
-
Wait for the timed obstacle rather than forcing the opening.
-
Cross the rotating bridge planks while they align.
-
Find the maintenance lock and identify the two valve controls.
-
Open Valve One, then locate Valve Two without entering the water.
-
Return to the high exit route and climb to safety.
-
If the rising water blocks the route, use the nearest checkpoint rather than repeating the entire opening.
DONT SPLASH Controls and Monster Detection
DONT SPLASH controls are simple enough to learn quickly, but their relationship to the monster is the most important part of the game. The blind creature detects the player through splash sounds, not ordinary vision. That means walking quietly on a safe platform is safer than crossing water, and using thrown pebbles can redirect attention without exposing your exact location.
The game’s verified community guidance also identifies pebbles as the only active decoy. Players should save them for cases where the creature has already locked onto the sound of their route. Randomly throwing one near the starting area wastes a resource that may be needed later.
| Action | Safe use | Risk |
|---|---|---|
| Walk on marked platforms | Follow yellow surfaces and wall arrows | Wandering onto an unmarked edge |
| Jump between dry platforms | Land on a confirmed yellow surface | Falling short and making a splash |
| Throw a pebble | Pull the monster away from the intended path | Throwing toward your own route |
| Enter water | Only when no dry path is available | Immediate noise and a likely chase |
| Wait at a checkpoint | Reorient before trying the next obstacle | Wasting time if the route is unclear |
Movement and aiming basics
Use the standard movement controls to walk, jump, and look around. The safest procedure is to stop at the edge of every platform, confirm the next yellow landing, and then make a single deliberate jump. Long inputs are unnecessary because the platforming sections punish overshooting more than they reward perfect distance.
Keep the camera pointed in the direction of travel. The black wall arrows can be missed when the camera remains fixed on the character, especially after a jump because the view may rotate or settle in an unexpected direction. Look first, turn second, and jump third.
Throwing without revealing your route
Pebbles work best when the monster is already moving toward a noisy area. Throw one across the water on the opposite side of your planned path, preferably after the creature has committed to investigating you. A pebble thrown directly beside your position may simply create a second danger point.
For the detailed item and hotbar procedure, consult the DONT SPLASH throwing and revival guide. The key principle here is simple: a decoy is useful only when it pulls attention away from the jump you are about to make.
DONT SPLASH Checkpoints and Failure Recovery
Checkpoint knowledge prevents one missed jump from erasing the full run. The important part of the dont splash checkpoints system is recognizing when to stop and restart. If a player falls after spending several minutes on a long section, returning to the last safe point is usually faster than repeating everything from the beginning.
A checkpoint is not a safety guarantee. Players should still arrive at it with a dry character, a readable route, and enough supplies for the next obstacle. Rushing back into the route immediately after respawning can create the same error again, especially when the opening section involves timing.
| Failure point | What to learn | Recommended response |
|---|---|---|
| Early yellow-platform jump | Landing distance and camera angle | Retry one jump at a time |
| Timed obstacle | Opening and closing rhythm | Wait for a full safe cycle |
| Rotating planks | Position of the moving surface | Step on when it points toward the landing |
| Maintenance lock | Location of the first valve | Explore dry corners before entering water |
| Final climb | Required order of valve actions | Confirm both valves are open |
When to restart a checkpoint
Restart when the mistake came from unclear information, such as overlooking an arrow or entering a room before understanding its layout. Continue from the checkpoint when you understand the obstacle but lacked precision. This distinction saves time because repeated failures often reveal that the player needs a better view rather than another identical attempt.
The official game page confirms that the challenge centers on crossing platforms above dark water. Consequently, fall detection should be treated as a route-reading problem. Before trying again, identify which visual cue you missed: a yellow platform, a black arrow, the obstacle’s timing, or the monster’s position.
Log Your Deaths as Route Data
A short death log can make later attempts noticeably faster. Record three details: where the fall happened, what signal was missed, and what action caused the splash. “Fell at rotating plank” is useful, while “bad jump” gives you no new information.
| Recorded mistake | Better action next attempt |
|---|---|
| “Missed the turn” | Scan the wall before leaving the platform |
| “Jumped while plank was rotating away” | Wait for alignment |
| “Got startled after the monster appeared” | Stop, use a pebble, then continue |
| “Landed on the wrong side” | Check the arrow from a dry stopping point |
DONT SPLASH Tips for the Timed Obstacles
The timed sections punish impatience more than they reward precision. A failed jump creates a loud splash and gives the creature a clear reason to move, while a delayed attempt costs only a short wait. Treat each obstacle as a timing problem with visual confirmation, not as a race to cross immediately.
These dont splash tips work best when the player separates observation from movement. First, watch one complete obstacle cycle. Then identify the platform that will remain stable during the approach, the point where it becomes unsafe, and the dry landing beyond it.
| Observation | Practical interpretation |
|---|---|
| Surface returns to the same position | The cycle is regular enough to time |
| Surface changes height | Use the return motion to plan the jump |
| Hazard blocks the direct route | Move sideways instead of forcing forward |
| Monster approaches during the cycle | Pause and create distance with a pebble |
| Water reaches the route | Prioritize the nearest dry checkpoint |
Wait for a complete cycle
Watching one full cycle reveals whether the obstacle pauses at a safe point or moves continuously. A surface that briefly holds its position provides a useful launch window, while a surface that never stops requires a timed landing instead. The same method applies to rotating planks: stand still long enough to see which face carries you toward the exit.
Community gameplay reports describe the rotating bridge as one of the route’s signature obstacles, while the opening area is primarily used to teach players to recognize yellow platforms and black arrows. Treat the first section as training for the later timing challenges, because its visual language continues throughout the route.
Manage the monster during a wait
Waiting beside water can be dangerous if the creature approaches. Move to the driest available corner, keep the camera on the creature, and throw a pebble away from the route only if one is available. If no pebble is available, use distance and sound discipline rather than starting an unnecessary confrontation.
The creature reacts to water noise, so simply standing still is safer than pacing or repeatedly jumping. A motionless player on a dry surface gives the monster less information, while frantic movement near the edge increases the chance of a splash.
DONT SPLASH Valve Route and Final Escape
The maintenance lock is the route’s main objective, and both valves must be opened before the final exit becomes available. Players often lose time searching for the second valve after interacting with the first. The reliable method is to inspect the room from a dry position, open the visible valve, then rotate the camera slowly and look for the other control.
The verified walkthrough by Zac Worthy demonstrates the intended order: follow yellow platforms and black arrows, cross the rotating planks, open both valves in the maintenance lock, and climb toward the high exit. The demonstration also confirms that the creature responds to splash sounds rather than player vision.
| Valve-room step | Action | Reason |
|---|---|---|
| Enter carefully | Remain on dry flooring | Avoid announcing your arrival |
| Identify Valve One | Look for the first wall-mounted control | Start the required objective |
| Open it | Interact only when the route is clear | Avoid being caught during the animation |
| Find Valve Two | Rotate the camera and check side rooms | Prevent backtracking |
| Open Valve Two | Confirm both objectives are complete | Enable the escape route |
| Climb to the high exit | Follow the dry ascent | Finish before the water blocks access |
Locating the maintenance lock
Follow the black arrows beyond the rotating planks and look for an enclosed industrial area rather than another open water route. The room’s pipes, controls, and restricted floor space distinguish it from the broader platform sections. The first valve is easy to recognize once you enter, but the second may be positioned around an angle or behind a dry partition.
Do not enter the maintenance room through deep water merely because the door looks wider. The creature hunts sound, and a direct splash may cause it to approach while you are still searching. If the water becomes unavoidable, move along the shortest exposed section and use a pebble to pull attention away before reaching the controls.
Completing the high exit
After both valves are open, return to the route leading to the high exit. The final climb should be handled with the same precision as the opening platforms. Check each landing, keep your movement deliberate, and do not look backward unless a sound suggests the creature has followed you.
If the route becomes partially submerged, use a checkpoint and re-enter from a safer dry angle. The final objective is to reach the exit, not to complete the climb without a single mistake. The high-exit route remains the priority when water and monster pressure compete for attention.
Is DONT SPLASH Scary, and How Should You Prepare?
DONT SPLASH is a horror platformer, and players should expect sustained tension even when they understand every mechanic. The primary threat is not sudden visual violence; it is the knowledge that a missed jump creates a loud splash and can bring the blind creature directly toward the player. That makes the game scary through anticipation.
The official Roblox listing describes a pool maze where a blind monster hunts by the sound of water. Players who dislike jump-focused horror may still enjoy the game because the route can be learned, but they should not expect the danger to disappear after memorizing the path.
| Player concern | What to expect | Preparation |
|---|---|---|
| Sudden scares | Less emphasis on jumpscares than stalking | Headphones with moderate volume |
| Monster visibility | The creature can approach without relying on sight | Listen for footsteps and water sounds |
| Failure frustration | Checkpoints reduce repeated route work | Learn one obstacle at a time |
| Audio sensitivity | Splashes and creature sounds drive tension | Adjust game and system volume |
| Difficulty selection | Higher settings may require faster decisions | Compare options in the difficulty guide |
Managing the sound-based threat
Headphones can reveal approaching footsteps, but excessive volume may also make sudden sounds more jarring. Keep the volume moderate enough to identify the monster’s direction without losing track of the platform visuals. The most useful warning often arrives as a change in the creature’s movement, although players should not stop moving long enough to create an edge mistake.
A dry route is always the preferred defense. When the creature is close, stop walking on exposed surfaces and avoid unnecessary jumps. If a decoy is available, throw the pebble toward a separate water area so the creature investigates a false direction.
Prepare without overcomplicating the run
Memorize the route in short stages rather than trying to learn the entire game at once. Learn the early yellow platforms, then the arrow sequence, then the timed obstacle, and finally the valve room. A broader overview of survival decisions appears in the beginner strategy guide.
Community-run reviews suggest that most progress comes from understanding the route before new tools unlock, rather than repeatedly making a full escape attempt. For example, reaching the valve room with a clear mental map lets you distinguish a missed arrow jump from an incorrectly timed obstacle, so each death becomes diagnostic. This knowledge-first approach also explains why route memorization matters even when stronger gear is available: recognizing the yellow platforms, arrow sequence, and timed obstacle reduces trial-and-error deaths caused by route confusion.
Frequently Asked Questions
Is DONT SPLASH very scary?
DONT SPLASH is tense because the creature hunts through sound, especially splashes in the pool. The tension comes more from being pursued and making precise jumps than from constant jumpscares, although the dark water, blind enemy, and rising escape pressure can still feel intimidating.
What is the correct route through DONT SPLASH?
Follow the yellow platforms, use black wall arrows to identify each turn, wait through the timed obstacles, and cross the rotating planks. Enter the maintenance lock, open both valves, then return to the dry ascent leading to the high exit before the water blocks the route.
Where are the checkpoints in DONT SPLASH?
Checkpoints appear at safe points along the escape route and return you to a previously reached section after a failed attempt. Their exact placement may vary with updates, so observe the checkpoint visual after each restart. If you are unsure how the system behaves, the checkpoint and revival guide explains the related recovery mechanics.
How do I avoid attracting the monster?
Stay on yellow platforms, move carefully near water, and avoid jumping into the pool. The monster responds to splash sounds, so a pebble can serve as a decoy when thrown into a separate area. Keep one available for moments when the creature is closing in on your intended path.
Can I finish DONT SPLASH without using a pebble?
Yes, because pebbles are helpful distractions rather than required route items. You can complete the game by following the dry route, waiting through timed obstacles, opening both valves, and remaining quiet near the water. The decoy is most valuable when the monster has already committed to your position.