
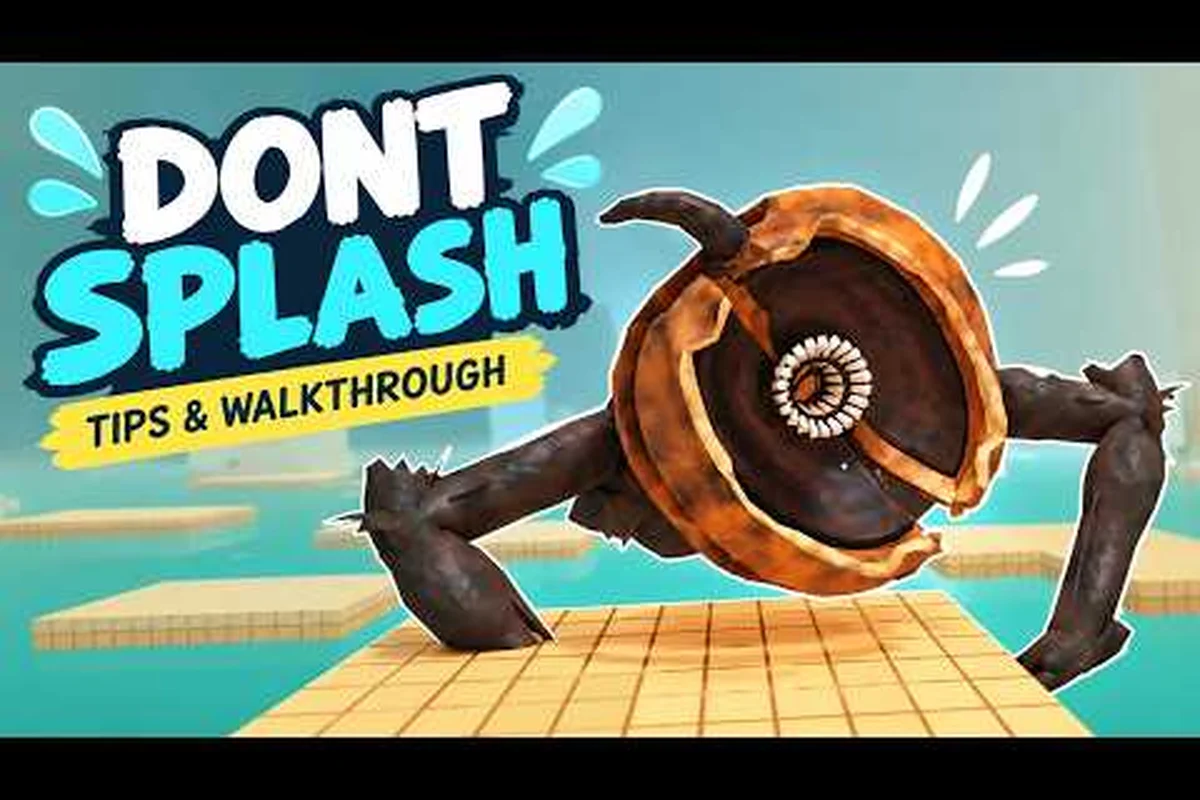
Choosing the dont splash best loadout means matching your tools to the failures that actually end runs: pebbles create distance, flares reveal threats, batteries keep your light alive, and the rescue rope recovers teammates, so the right four-slot setup varies with your playstyle.
DONT SPLASH Best Loadout and Tool Priorities
Choosing the dont splash best loadout matters because every tool can rescue a run—or be wasted at the wrong moment. This guide explains which tools to buy, how to upgrade them, and when to prioritize pebbles, flares, batteries, or the rescue rope. Learn the hotbar strategy that turns limited supplies into reliable escapes.
The official DONT SPLASH game page on Roblox describes an obstacle-course escape built around utility tools, including pebbles, flares, toy batteries, and a rescue rope. The strongest setup is not simply the rarest collection; it is a compact set that covers distraction, illumination, recovery, and power without slowing you down when danger closes in.
The Four Essential Tool Categories
A balanced dont splash best loadout needs four functions. Pebbles create a decoy, flares reveal or cover a dark area, the toy battery supports light-based utilities, and the rescue rope helps you recover from a missed jump or a teammate in trouble.
| Tool | Main function | Best use | Primary limitation |
|---|---|---|---|
| Pebble | Create a distant decoy | Distract danger before a risky movement | Limited count and useful only when aimed well |
| Flare | Produce light coverage | Cross dark sections or distract from a distance | Finite or condition-based use |
| Toy battery | Power light utilities | Keep illumination-related tools operational | Finite charge |
| Rescue rope | Reach and recover | Save a teammate or regain a missed position | Requires a clear target |
The official Roblox listing identifies the same core tools and points to utility stats such as throwing range, pebble skipping, flare radius, battery power, rescue speed, and rope reach. That means the right choice depends on both the tool and the upgrade attached to it.
Start with the pebble because it is the only active decoy. Add the rescue rope for recovery, then bring a flare when a stage becomes dark. The toy battery is best treated as support for a related light utility rather than something to use simply because it occupies a slot.
Recommended Early-Stage Loadout
The most dependable dont splash best loadout for a new run is Pebble, Rescue Rope, Flare, Toy Battery. It gives you a distraction tool, a recovery option, and enough light coverage to handle environmental hazards. The order matters because the first two tools should answer the most common failures.
| Priority | Tool | Why it earns the position |
|---|---|---|
| 1 | Pebble | Pulls attention away when a jump or passage is guarded |
| 2 | Rescue rope | Repairs mistakes and helps stranded players |
| 3 | Flare | Creates visibility in dark sections and offers ranged coverage |
| 4 | Toy battery | Supports light-based utility when its charge remains |
Community tips consistently place pebbles first and the rescue rope second, as reported in the verified DONT SPLASH tips video by TonyCool. That early ordering prevents you from burning a flare or battery on a problem that a well-placed pebble can solve for free.
A compact hotbar also has a hidden benefit: you can change tools without cycling through distractions. The walkthrough by Zac Worthy shows that selecting a tool with a number key, pressing again to put it away, and clicking to use it keeps the controls responsive. A focused inventory makes it easier to act before a threat closes the gap.
DONT SPLASH Which Tools to Buy and Why
When deciding dont splash which tools to buy, judge each purchase by the problem it solves and the stage conditions you expect to face. Tools that solve opposite problems are more valuable than several variations of the same function. The official listing confirms that the game revolves around tool-assisted escaping rather than simply collecting decorative items.
Buy the Pebble First
The pebble is the foundation of nearly every effective setup. Its job is to create a target somewhere else, allowing you to move while attention shifts away from your route. A pebble skipped across a pool can be especially valuable because it can make the throw itself part of the distraction.
| Buying priority | Purchase | Reasoning |
|---|---|---|
| Best early value | Pebble | Solves immediate movement pressure with reusable decoy potential |
| Strong second purchase | Rescue rope | Recovers from positions where a missed jump ends the run |
| Context-dependent third | Flare | Answers darkness or creates a temporary area of control |
| Flexible fourth | Toy battery | Supports light-based tools without replacing the first three |
The best dont splash best loadout does not mean carrying four highest-tier tools at all times. A useful pebble is more valuable than a stronger tool used with poor timing. Community footage shows pebbles being thrown before risky jumps, while flares are reserved for dark sections and the rope for teammate recovery. Those are use-case purchases, not fixed rarity rankings.
Add the Rescue Rope for Recovery
The rescue rope is less flashy than a decoy, but it protects the entire run from a single positioning mistake. A rope that reaches farther can correct a larger error, while a faster rescue improves the chance of completing a recovery before a moving threat reaches you. Those effects make rope upgrades unusually valuable across multiple stages.
The tool also fits naturally into a four-slot setup. If you understand its aiming and reach requirements, the rescue rope guide explains how slot count, reach, and rescue speed affect recovery decisions. That matters because the rope is not merely a backup; it can preserve a run that would otherwise be lost.
Carry a Flare for Dark Sections
A flare becomes essential when visibility determines whether you can read a route. Use it to illuminate a dangerous gap, draw attention away from your position, or cover a teammate’s movement. Its radius determines how much of the route it can affect, so an upgrade that expands coverage provides more practical value than a small numerical gain elsewhere.
| Situation | Best tool | Reason |
|---|---|---|
| Guard blocks a jump | Pebble | Moves attention before you commit |
| Landing platform is hard to see | Flare | Improves route readability |
| Teammate falls or gets stranded | Rescue rope | Creates a recovery path |
| Light tool is running low | Toy battery | Restores the related utility |
| Several threats appear together | Flare plus pebble | Combines visibility with a decoy |
Use the Toy Battery Selectively
The toy battery has finite charge, which makes it a support item rather than a dependable emergency answer. Bring it when your route or loadout includes a light-related utility that benefits from having emergency power. If all four slots are occupied with more immediate tools, leave it in storage instead of carrying it merely to complete the set.
The verified DONT SPLASH gameplay by UnoTwo indicates that the battery operates on limited power while maximum-stat passes improve related attributes to level 3/3. Without those upgrades, you should budget every charge and avoid spending it on a situation a flare can handle.
DONT SPLASH Tool Upgrade List and Upgrade Order
A useful dont splash tool upgrade list prioritizes survivability, reach, and information before minor convenience. The official game page identifies six relevant utility areas: throwing range, pebble skipping, flare radius, toy battery power, rescue speed, and rope reach. These are the clearest categories to evaluate in the lobby.
Spend Upgrades on the Stats You Rely On
Your first upgrade should match the tool you trust most. If pebbles carry most of your runs, improve their throwing range or skipping behavior. If the group repeatedly loses teammates to missed jumps, prioritize rescue speed or rope reach. The best upgrade is the one that fixes a recurring failure, not merely the one with the largest number attached to its label.
| Upgrade area | Best benefit | Ideal for | Priority |
|---|---|---|---|
| Throwing range | Place decoys farther from your path | Players using pebble distractions | Very high |
| Pebble skipping | Create more reliable water skips | Technical throwers and long routes | High |
| Flare radius | Cover more of a dark section | Later stages with weak visibility | High when needed |
| Toy battery | Extend powered light utility | Battery-dependent builds | Medium |
| Rescue speed | Recover before danger closes in | Cooperative or mistake-prone runs | High |
| Rope reach | Connect with a more distant target | Rescue-focused players | High |
The dont splash how to upgrade tools decision becomes simpler when each purchase is tied to a concrete habit. A player who throws pebbles toward distant pools needs range and skipping. A player who regularly rescues others needs a longer and faster rope. Buying every stat at once usually delays the one upgrade that would improve the entire run.
Recommended Lobby Upgrade Sequence
The following order balances immediate usefulness with long-term flexibility. It assumes a player has basic access to the four core tools and wants the strongest practical progression rather than the fastest cosmetic completion.
| Stage | Purchase target | Reason for the order |
|---|---|---|
| First | Pebble-related range or skip upgrade | Improves the game’s most common distraction tool |
| Second | Rescue speed or rope reach | Reduces the impact of missed positions |
| Third | Flare radius | Expands control in dark areas |
| Fourth | Toy battery power | Supports the remaining light utility |
| Later | Additional slot capacity | Makes a fuller loadout practical |
| Final | Remaining utility improvements | Finishes the stats tied to frequently used tools |
The dont splash lobby upgrades should be approached as a layered system. Upgrade the active tool first, add recovery next, and expand slot capacity before overinvesting in every secondary attribute. The cash and upgrade priority guide provides a deeper budget breakdown for deciding which purchase comes first.
When Slot Capacity Matters
A fourth slot is more valuable when it lets you carry a context-specific answer without abandoning a dependable core. A three-slot setup can work well, but it forces you to replace one reliable tool every time conditions change. With four slots, you can keep the pebble and rope while adding a flare or battery for the current stage.
| Number of slots | Practical loadout | Main benefit | Main drawback |
|---|---|---|---|
| One | Pebble | Maximum control over timing | Little protection against other problems |
| Two | Pebble plus rope | Distraction and recovery | Weak handling of darkness |
| Three | Pebble, rope, flare | Covers the most common hazards | No battery backup |
| Four | Pebble, rope, flare, battery | Full specialized setup | Requires meaningful upgrade investment |
This is where bottle unlocking becomes relevant in a broader sense: access to more tools improves the choices behind the dont splash best loadout. If bottles are randomized, avoid saving a random unlock without checking what it contains. Confirm the reward before spending scarce resources, because a duplicate or low-priority item can delay the lobby upgrades you actually need.
DONT SPLASH Bottle Unlocking and Upgrade Planning
Bottle unlocking can expand your available tools, but it should support a deliberate plan rather than create a cluttered inventory. The dont splash bottle unlocking process is most valuable when you distinguish between permanent access, temporary choices, and duplicate rewards. A clear decision framework prevents bad luck from dictating your entire progression.
Treat Unlocks as a Collection Decision
Do not judge an unlock by its animation or rarity alone. Ask three questions: Does it add a missing function? Does it improve a tool you already use? Is it redundant with a stronger owned option? If the answer is no to all three, the unlock belongs in storage until a stage-specific need appears.
| Unlock result | Best response | Loadout effect |
|---|---|---|
| New active tool | Test it before buying related upgrades | Adds a new option |
| Duplicate tool | Keep for backup or sell if allowed | Protects against tool loss |
| Upgrade token | Apply to the most-used tool | Improves an existing function |
| Cosmetic item | Save until later | No competitive slot value |
| Low-priority utility | Hold in storage | Useful only for specific stages |
A broad DONT SPLASH tools guide can help you compare the complete set before deciding whether a new unlock deserves a permanent place. The important point is to evaluate function and stat value, not simply the number of items you have collected.
Plan Around Your Weakest Stage
Review your recent runs and identify the failure pattern. Repeated darkness problems justify a flare and radius upgrade. Frequent missed jumps point toward rope reach and rescue speed. If danger regularly gathers near difficult water crossings, invest in throwing range and pebble skipping. This evidence-based approach makes the dont splash how to upgrade tools plan more efficient than buying in whatever order appears first.
| Failure pattern | Best upgrade response | Loadout response |
|---|---|---|
| Cannot position a decoy | Improve throwing range | Keep the pebble equipped |
| Pebble fails to skip | Improve pebble skipping | Practice longer water throws |
| Dark route is unreadable | Improve flare radius | Carry a flare |
| Rescue arrives too slowly | Improve rescue speed | Keep the rope ready |
| Rope cannot reach target | Improve rope reach | Plan target selection earlier |
| Power runs out early | Improve toy battery | Carry it only when relevant |
Avoid Upgrade Overspending
Spending every available unit on one tool can make that tool excellent while leaving a fatal gap elsewhere. Keep enough currency for a recovery option and one situational slot. A practical budget divides between the active core, a failure-prevention upgrade, and slot flexibility. The exact percentages vary as you earn more, but the priority does not.
The dont splash which tools to buy decision should be reviewed after each bottle reward. If you now own two flares, one may be enough; if you own no rope, it may be the next target. Reevaluate based on actual inventory rather than following a static shopping list indefinitely.
DONT SPLASH Best Loadout Strategies for Real Runs
The dont splash best loadout is a sequence of decisions, not a fixed arrangement carried without thought. Route conditions determine when each tool should leave the hotbar. The verified no-commentary stage footage shows pebbles timed before risky jumps, flares covering dark sections, and the rope used to recover a teammate.
Build a Decision Tree Before Moving
Before every major obstacle, identify the next likely failure. Will you struggle to see the landing? Will a guard crowd the route? Will a teammate fall? Select the tool that answers that specific problem, use it, then return to the best default state.
| Threat or obstacle | Select first | Follow-up action |
|---|---|---|
| Guard at a jump | Pebble | Throw toward the alternate route, then move |
| Unreadable platform | Flare | Illuminate the landing before jumping |
| Stranded teammate | Rescue rope | Secure the target and complete the rescue |
| Low light-tool charge | Toy battery | Restore power before the next dark section |
| Several problems at once | Pebble plus flare | Create both attention and visibility |
Hotbar discipline matters because unnecessary tool changes can create delays. Keep the pebble selected for ordinary travel, the rope selected when the team is near a ledge, and the flare selected when darkness becomes the immediate issue. Select tools as conditions change rather than switching every few seconds.
Save Limited Resources
Pebbles have a cap of eight without upgrades, according to the gameplay evidence from UnoTwo, while batteries operate with finite charge. Treat both as limited resources. A pebble spent on a harmless enemy is a resource that cannot solve a later obstacle, and a battery used for a small lighting task may leave you without power near the finish.
-
Throw early: A decoy can work better when placed before danger enters your path.
-
Aim beyond the guard: Distraction is most useful when it pulls attention away from your route.
-
Carry one context tool: Avoid bringing a full inventory of tools that solve the same problem.
-
Reserve the rope: Do not spend its usefulness by using it for trivial gaps.
-
Upgrade capacity: Additional slots are valuable because they reduce forced replacements.
Coordinate Around the Rope
A rescue rope becomes much stronger when the team communicates about target positions. One player can stabilize on a safe platform while another attempts the recovery. If the rope has low reach, communicate from a closer safe point rather than forcing a difficult connection. The best first purchase guide is useful for establishing an early tool order before attempting advanced recovery play.
| Team situation | Best action | Why |
|---|---|---|
| Teammate slips but remains reachable | Use the rope immediately | Early recovery reduces danger |
| Teammate lands on a stable ledge | Wait for a clearer line | Prevents a second failed rescue |
| Both players are exposed | Create a pebble distraction first | Buys space for the rescue |
| Rope is too short | Move closer when safe | Reach beats risky attempts |
Change the Loadout by Stage Type
A route with broad water sections rewards a long-range pebble setup. A cave or nighttime section favors a flare with expanded radius. A vertical obstacle course may make rope reach and rescue speed more important. Keep the core dependable, but swap the fourth slot to match the current challenge.
The best dont splash best loadout for escaping danger is therefore flexible: pebble first, rope second, context tool third, battery when needed. The official game page confirms that the tools and their stats serve escape mechanics directly, so improving the chosen setup should improve your ability to read the course and recover from mistakes.
Frequently Asked Questions
What is the best beginner loadout in DONT SPLASH?
The best beginner loadout is pebble, rescue rope, flare, and toy battery. The pebble handles distractions, the rope supports recovery, and the flare covers dark areas. Carry the battery when your route needs sustained light, because its charge is finite. A three-slot version—pebble, rope, flare—works well until a stage requires battery-powered utility.
Which tools should I buy first in DONT SPLASH?
Buy the pebble first, followed by the rescue rope. Pebbles provide active distraction, while the rope prevents one positioning mistake from ending a run. Add a flare if the course includes dark sections or if ranged area control is valuable. Delay the battery until you understand its role and can avoid wasting its limited charge.
Should I upgrade tools or buy more slots first?
Upgrade the tool you use most, then secure a recovery option, and buy extra slot capacity afterward. Early pebble range or skipping and rope reach or rescue speed usually produce broad benefits. More slots become especially valuable once you own enough distinct tools that carrying them together is practical rather than cluttered.
Does bottle unlocking guarantee a better tool?
No. A bottle can produce a useful tool, an upgrade token, a duplicate, or a less relevant item. Inspect the reward before committing it to a permanent loadout. The best outcome adds a missing function or improves a tool you already rely on; duplicates and cosmetics are usually safer to store for later.
How many pebbles should I carry in DONT SPLASH?
You can carry up to eight pebbles without upgrades, according to verified gameplay footage. You do not need to use all eight, and the cap is a limit rather than a target. Save pebbles for obstacles where attention would otherwise block your route, and consider the throwing-range or pebble-skipping upgrade if accurate long throws remain difficult.