
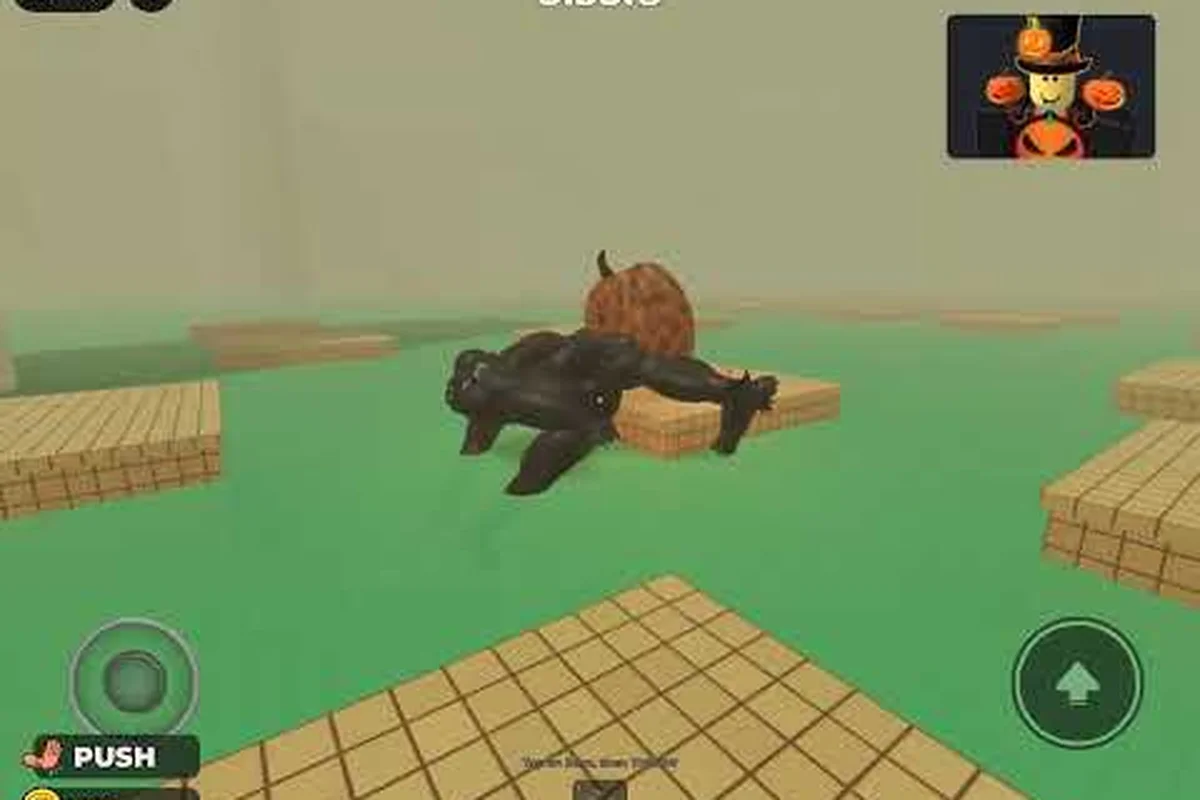
DONT SPLASH extra stages reward careful route reading because each obstacle type hides a different timing cue. Yellow markers identify the intended path, dark-bordered tiles can trigger splash hazards when crossed at the wrong moment, and wall arrows reveal the required direction. On the rotating bridge, wait for its alignment before committing; on sinking platforms and the broken walkway, move only while the surface remains stable, then jump immediately when the next safe tile appears. The rotating platforms add a second timing check, so matching a marker alone is not enough—you must also reach the landing point before the platform turns. Combine the maintenance lock clue with these route markers, and a correct route prevents the water from catching you.
Roadmap for Dont Splash Extra Stages
The dont splash extra stages route begins in the lobby and then passes through basic platforms, a broken walkway, sinking platforms, rotating structures, and a valve-locked maintenance room. The official DONT SPLASH game page identifies those core stage sections, although the developer has not published a definitive total stage count.
That distinction matters when players search for hidden areas. A complete run may contain rooms that look optional, while branching platform layouts create several legitimate paths. The goal is not to touch every tile; it is to recognize which path follows the game’s visual language and keeps the water out of the monster’s range.
| Route section | Main clue | Core challenge | Best first move |
|---|---|---|---|
| Lobby | Exit markers and player flow | Finding the correct opening | Follow the visible crowd briefly, then check dry corridors |
| Basic platforms | Yellow navigation tiles | Maintaining momentum | Jump only after landing fully |
| Broken walkway | Narrow ledges and gap spacing | Choosing a safe branch | Take the wider landing unless it blocks the intended route |
| Sinking platforms | Dark-bordered safe tiles | Managing unstable footing | Rest on bordered tiles between moves |
| Rotating structures | Changing orientation | Reading the movement cycle | Wait for a platform edge to face the next jump |
| Maintenance room | Two valves and rising water | Operating the lock quickly | Identify both valves before attempting the exit climb |
Reading the intended path
The most reliable yellow platform markers point toward the intended route, while black wall arrows become important in dry corridors where the floor itself offers no obvious direction. These signs work together: yellow tiles reveal where movement continues, whereas arrows clarify the route through enclosed passages.
Players should also distinguish route markers from decorative objects. The official game page mentions Halloween props and limited-time cosmetics added around the V2 stage update, but community reports indicate that the basic water rules remain unchanged. A pumpkin, barrier, or seasonal prop may alter the scenery without making a platform safe or replacing the established marker system.
Checkpoints and branch awareness
A verified community walkthrough reports that reviving after a fall returns the player to the last checkpoint reached. This makes the route forgiving, but it does not remove the value of learning each obstacle type. Falling can also consume time, bring the monster closer, and cause a player to enter a later section with less confidence.
For a broader overview of the room order, the DONT SPLASH stage list and room guide can help distinguish the main progression from optional-looking branches. In this guide, however, the focus stays on the mechanics that determine which route is actually safe.
dont splash basic platforms and broken walkway routes
The early portion of dont splash extra stages establishes a visual grammar that becomes more important later. Yellow tiles indicate the intended path, but the correct route also depends on platform width, landing distance, and whether a gap forces a risky correction. The basic section is forgiving enough to learn the controls, while the broken walkway turns that knowledge into a branching test.
Crossing the basic platforms
On dont splash basic platforms, consistency matters more than speed. Players should land with enough momentum to make the next jump, but they should also avoid carrying enough speed to overshoot the intended tile. A short pause after each secure landing can prevent a missed grab and gives the player time to scan the next gap.
| Basic-platform situation | What to watch | Practical adjustment |
|---|---|---|
| Wide platform followed by a long gap | Landing edge and next platform’s near edge | Build momentum gradually rather than sprinting |
| Small platform between larger tiles | Whether the middle tile carries a yellow marker | Prefer the marked tile when it offers a clean landing |
| Several equal routes | Alignment with the visible corridor | Choose the line that keeps the next landing unobstructed |
| Platform near the water’s edge | Monster distance and jump recovery | Avoid turning around late if the landing is already secured |
| Unclear next step | Yellow route marker or nearby wall arrow | Pause and read the next two platforms before moving |
A useful three-landing rhythm is to land, orient, and then jump. It may feel unnecessarily slow during the first area, but it establishes the control pattern needed for unstable surfaces. The goal is to arrive at every platform with your character aligned toward the next one rather than correcting position at the last possible moment.
Choosing a branch on the broken walkway
The dont splash broken walkway offers narrow-ledge and wider-jump choices, as documented in a verified no-commentary walkthrough. Wider landing zones generally make the jump easier, but the path is not always simply the shortest physical line. Players should compare the landing point, the following gap, and any visible route marker before committing.
Narrow ledge sections are best treated as precision routes. A player who can hit the ledge cleanly may use it, but repeated corrections increase the chance of falling. Wide-jump branches offer more room to recover, yet a large jump can carry the player beyond the useful part of the route. Neither option is universally superior; the deciding factors are platform alignment and what comes after the landing.
| Broken-walkway cue | Likely meaning | Route decision |
|---|---|---|
| Yellow tile at the ledge | The precision line is marked as intended | Use it if your landing is reliable |
| Wide platform across the gap | Recovery space is available | Take it when the next route is unclear |
| Dry corridor with a black arrow | A turn follows the wall | Follow the arrow before choosing the next platform |
| Gap with no marker or arrow | Optional or risky branch | Avoid it unless the main route is blocked |
| Narrow edge above deep water | Small correction area | Commit early and do not chase a missed jump |
The updated DONT SPLASH rooms guide is useful for checking how the V2 content relates to the current progression. During a run, though, the best evidence remains in the environment: a marked platform is usually stronger guidance than an unmarked shortcut.
A safer entry into later rooms
Players often carry too much momentum out of the basic platforms and then mistake hesitation for a difficult rotation or sinking section. After reaching a checkpoint, stop briefly and identify the next room’s feature. If the floor is visibly intact, plan a two-platform jump. If tiles have dark borders, treat those as stable resting points. If a structure turns, begin the timing check before entering it.
This habit also prevents avoidable mistakes during a retry because revival returns the player to the last checkpoint, not to the start of the current room. Recognizing an incoming rotating bridge, sinking platform, or broken walkway before entering lets you approach its activation point at a controlled speed, land on a stable tile, and preserve momentum for the next obstacle. If the room contains a maintenance lock, use the pause before touching its mechanism to check the surrounding platform state; a mistaken early jump can turn a readable rotation into an immediate reset.
dont splash sinking platforms timing guide
The sinking-platform section is built around one important visual rule: dark-bordered tiles remain static and serve as safe rest spots. Unbordered tiles may sink after weight is applied or disappear at timed intervals, so players need to keep moving without turning the route into an uncontrolled sprint.
Why the border matters
A community tips video identifies the dark-bordered tiles in the sinking area as static safe tiles. This makes the dont splash sinking platforms puzzle about spacing your weight across reliable surfaces. It is not enough to touch a safe tile; you must leave it with enough time to reach the next reliable point before it becomes inaccessible.
| Platform feature | Observed behavior | Route implication |
|---|---|---|
| Dark border | Remains static | Use as a recovery and timing checkpoint |
| Plain tile | May sink or be timed | Keep movement brief and predictable |
| Large cluster of plain tiles | Several unstable steps | Aim for the nearest bordered tile instead of crossing blindly |
| Short gap after a safe tile | Easy to misjudge | Wait on the border until the landing is visible |
| Long gap from a safe tile | Recovery is limited | Verify the next stable tile before leaving |
A three-phase timing method
Use a settle, scan, commit method for this room to avoid unnecessary extra stages. First, settle fully on a bordered tile so the player cannot drift into a broken walkway or sinking platform. Second, scan the next unmarked section and identify the nearest safe destination, including the reach of a rotating bridge or rotating platforms. Third, commit to the jump only when that destination remains visible; if it disappears behind the rotating platform, wait for the next rotation rather than forcing a blind leap.
This approach reduces the temptation to panic. If a jump fails, the player can still recover from a recent static tile, while repeated hopping in place increases risk without improving the route. Because the monster can be moving nearby, quiet decisions matter as much as athletic precision.
When to keep moving and when to wait
Waiting is smart when a plain tile sits between two bordered tiles, because that section is likely a timed crossing. Waiting is less necessary when several plain tiles form a direct path to a wide, clearly marked landing. The difference lies in how much uncertainty follows each step: a short, readable line allows immediate movement, while a blind landing calls for a full stop on the nearest safe tile.
Do not assume every yellow tile is stationary. The yellow marker can identify the intended path through the section, but the platform’s border and apparent behavior still determine whether it is a place to pause. On the dont splash sinking platforms route, a yellow tile may be a necessary crossing point without being a safe waiting point.
Recovering from a poor start
If a player enters the section on an unstable tile, avoid trying to reverse across several sinking surfaces. Move toward the next visible bordered tile, since reversing can split the remaining route into two difficult decisions. If the monster is close, a direct recovery is usually better than a slow retreat over the same unstable tiles.
Community testing and player reports treat the borders as the dependable visual cue for distinguishing a normal platform from a sinking platform. For example, if a tile’s border is visible but the center has already begun dropping, treat that section as the broken walkway rather than a safe landing point. This visual read matters because a successful jump can still trigger a sink when weight lands on the platform’s unstable center. Seasonal events may alter stage layouts or timing, but no official information indicates that the core sinking rule changes, so border recognition remains the safest way to avoid extra stages.
Dont Splash Moving Bridge and Platform Sections
The rotating section tests anticipation rather than raw jumping speed. A bridge or platform that appears to offer a clear crossing can become awkward if the player jumps based on its current position instead of its next position. Reading the rotation cycle is the safest way to preserve momentum.
Reading the dont splash rotating bridge
The dont splash rotating bridge functions as a moving connection between fixed areas. Before stepping on, observe one complete direction change if possible. Note where the bridge begins its sweep, which side reaches the landing first, and whether the far landing remains accessible when the bridge aligns.
| Rotating-bridge cue | Timing lesson | Safer action |
|---|---|---|
| Bridge is approaching the player | Entry moment is opening | Step on only when the connection is stable |
| Bridge has just passed the entry | Wait time may be short | Prepare, but do not force a late jump |
| Far side aligns before the near side | The route favors the far platform | Let the structure reach that position |
| Rotation appears irregular | Assume every jump must be verified | Use fixed ground for observation |
| Monster is close to the center | Center is a poor waiting zone | Move through at the first reliable opening |
Handling dont splash rotating platforms
The dont splash rotating platforms can create moving or turning surfaces beyond the main bridge. Their surfaces may still rotate even when their centers stay in one location. That means a player can stand on a safe tile and still lose a later landing if the platform turns during the approach.
A useful technique is to watch the near edge align with the target edge. Do not focus only on the platform’s center, because the direction of the whole structure may shift the usable landing space. On a narrow platform, a small turn can leave the player clinging to an edge; on a wider one, the same turn may be harmless.
When a moving section feels unpredictable
If the rotation is difficult to read, step back to fixed ground and watch another cycle. Players sometimes misclassify an unfamiliar section because they are trying to solve it while under pressure. A ten-second observation from a safe position can reveal whether the platform moves in a full rotation, a short sweep, or an alternating pattern.
The relevant platform timing overview in the DONT SPLASH timed-platform areas guide provides more context on the lobby and timed sections. In the rotation room, the key is to combine that general awareness with one direct observation: the next usable position matters more than the platform’s present angle.
Maintaining space around the monster
The center of a rotating structure may offer more room, but it can also leave the player surrounded by moving parts and close to the monster. A route near the edge can feel exposed, yet a fast crossing reduces the time available for a creature to intercept. There is no universal safe lane, so use the gap that keeps the shortest continuous path rather than a position that merely looks roomy.
A successful crossing often looks uneventful: one observation cycle, one timed entry, and no unnecessary pause on the rotating surface. Watch the platform’s rotation through a full cycle before committing, since the shortest gap may arrive only after the broken walkway or sinking platforms have shifted the monster’s route. If the crossing becomes messy, return to a fixed checkpoint and repeat the rotating bridge segment with a clean rhythm, avoiding an extra stage rather than improvising through the maintenance lock.
dont splash maintenance lock and exit route
The maintenance room is the final major test described in the verified walkthroughs. It contains a two-valve maintenance lock, and opening the exit door requires the rising-water threat to be managed. The room is less about discovering a concealed platform and more about recognizing the required interaction order under pressure.
Finding both valves
Begin by scanning the room for two distinct valve controls rather than focusing on the exit immediately. The dont splash maintenance lock will not open from a single visible interaction, and players who activate one control without locating the other may waste the time available before the water rises.
| Maintenance-room clue | Likely action | Why it matters |
|---|---|---|
| First valve handle | Rotate or activate it | Starts the lock-opening sequence |
| Second valve in another section | Operate after the first | Completes the required two-part release |
| Exit door indicator | Confirms lock state | Shows whether the door remains closed |
| Rising water | Creates urgency | Limits time for searching and retries |
| Dry corridor or wall arrow | Leads toward a control | Prevents wandering in the wrong direction |
Working the lock efficiently
Plan the route in the opposite direction from the exit. Locate both controls, note which is closest, and determine whether the door responds after each activation. This prevents the common mistake of running to the exit after the first valve, finding it still locked, and then reversing through the room.
The maintenance area’s two-part release should be treated as one objective. Players can learn the valve locations during an earlier attempt, use the dry corridors to keep distance, and then execute both activations without unnecessary backtracking. The official game page describes the maintenance room as a valve-locked section, while verified community walkthroughs provide the more specific two-valve sequence.
The final high exit climb
After the lock opens, the route ends with a high exit climb. The verified walkthrough by Zac Worthy shows that yellow platform markers, wall arrows, and dry corridors guide players through the room and toward the elevated exit. Treat this climb as the last controlled sequence rather than a free-form jump challenge.
Look ahead for the next yellow landing marker and avoid looking down at the water. Since a mistake sends the player back to the last checkpoint, a cautious approach here can still be faster than a failed jump followed by a recovery run.
A complete route strategy for dont splash extra stages
A reliable run combines route knowledge with consistent movement. The game’s visual cues can reveal a safe path, but only movement discipline keeps that path usable when a monster is nearby. The following checklist turns the individual mechanics into one coherent strategy.
Before entering a room
Pause at a checkpoint and identify the room type before crossing its first platform. Basic areas call for spacing, broken walkways call for branch comparison, sinking sections call for border recognition, and rotating areas call for a complete movement observation.
| Room type | First thing to identify | Main mistake to avoid |
|---|---|---|
| Basic platforms | Yellow marked route | Overshooting from excess speed |
| Broken walkway | Wide branch versus narrow marked ledge | Choosing a gap without checking what follows |
| Sinking platforms | Nearest dark-bordered tile | Standing on a plain unstable tile |
| Rotating bridge | Alignment during the next cycle | Jumping at the bridge’s current edge only |
| Rotating platforms | Target edge after rotation | Focusing on the center instead of the landing angle |
| Maintenance room | Location of both valves | Searching after the water begins rising |
During a full run
Use checkpoints as learning boundaries. If a player struggles in the broken walkway, examine the landing after the narrow ledge rather than repeatedly changing speed without a plan. If a rotation attempt fails, observe one full cycle from fixed ground before trying again.
Route reading, movement rhythm, and room-specific timing should be treated as three separate skills. First, read the intended path across the broken walkway, sinking platforms, rotating bridge, or rotating platforms; then establish a stable movement rhythm before adjusting it for unstable or rotating surfaces. This separation matters because a correct route cannot compensate for mistimed acceleration: on the broken walkway, landing alignment should be secured before speed changes, while on rotating platforms, each jump should begin from the platform’s actual angle rather than its visual starting position. Treating these decisions independently makes failures easier to diagnose and prevents one mistimed input from turning into a missed landing or an unnecessary respawn.
Handling monster pressure
The monster changes how much information a player can gather. When it is far away, use the opportunity to inspect the next room. When it is close, choose the shortest reliable route rather than the most interesting-looking branch. This is especially important near the maintenance room, where a wrong turn cannot be corrected cheaply.
Community walkthroughs show that a fall returns the player to the last checkpoint, but repeated failures still disrupt progress and can force a long replay of the route. A clean restart after one mistake is more effective than improvising several risky jumps with little visual information. For example, if the route crosses a sinking platform or rotating bridge, rewind before committing to the next basic-platform sequence; the extra reset time is usually cheaper than activating an unintended extra stage or losing a collected item, and it keeps the monster-pressure encounter manageable.
Checking the current stage version
The official game listing was updated to identify V2 and new stage content in late October 2026, though the exact total remains unpublished. Seasonal decorations and limited-time cosmetics may alter the environment. For update-specific changes, the DONT SPLASH V2 update overview can help distinguish lasting route mechanics from temporary props.
The essential rules remain consistent across reported stage layouts: follow yellow markers, watch black wall arrows, trust dark borders on sinking tiles, observe rotating structures, and find both maintenance valves. If a later update changes one of those rules, the official game page and update logs should take priority over this guide.
Frequently Asked Questions
How many dont splash extra stages are there?
The developer has not published a definitive stage total. The confirmed route includes basic platforms, a broken walkway, sinking platforms, rotating bridge sections, rotating platforms, and a valve-locked maintenance room; branching layouts can add optional paths, so the playable count may depend on which routes are accessible.
Are yellow platforms always safe in DONT SPLASH?
Yellow platforms generally mark the intended route, but they do not always identify a permanent resting place. In the sinking-platform areas, check the tile border before committing your weight: a dark-bordered surface is more likely to remain static, while a yellow-marked tile may sink after contact and leave you without time to correct a bad jump. Treat the color as route guidance, but use the border as the stronger signal for whether you can safely stop.
What is the safest way across the broken walkway?
Choose the branch whose landing remains clear after the jump. A narrow yellow-marked ledge works when your aim is reliable, while a wider branch is safer when it provides room to recover and still leads toward the intended route.
How do I beat the rotating bridge safely?
Watch one full rotation from a fixed ground position, then time your move by the rotating bridge section’s usable edge rather than its current center. If the far landing aligns while the connection is still shifting, wait for the next pass; stepping during that brief overlap can send you onto a moving edge or miss the landing entirely.
What does the maintenance lock require?
The maintenance room uses a two-valve release, so locate and operate both controls rather than assuming one opens the entire lock. After each valve, check that the exit door actually responds; once both are activated and the door is usable, begin the high exit climb. This matters because rising water can cut off the route, and a missed valve may strand you in the valve-locked maintenance room.
DONT SPLASH extra stages become much more manageable once every room is treated as a distinct route-reading problem. Yellow markers, wall arrows, dark borders, moving edges, and two maintenance valves all provide actionable clues, so careful observation can replace blind jumps and wasted retries.